Calculated attributes for Assets
eazyBI for Jira
Calculated attributes is available on Cloud and since eazyBI version 9.0.
When importing data from Assets, you can define new calculated fields to extend your analysis. These calculated attribute fields use JavaScript to pre-calculate values based on object attributes during the data import.
Assets calculated attributes are defined directly in the eazyBI account and are not available in other accounts. They are available to users: Jira system administrators, Jira trusted users, eazyBI admins, and eazyBI account users with roles that allow source data import.
On this page:
Create a new calculated attribute
Go to the Source Data and edit the import options for the Assets data source. In the Attributes tab, scroll down to the page bottom, where there is an option to add a new calculated field.
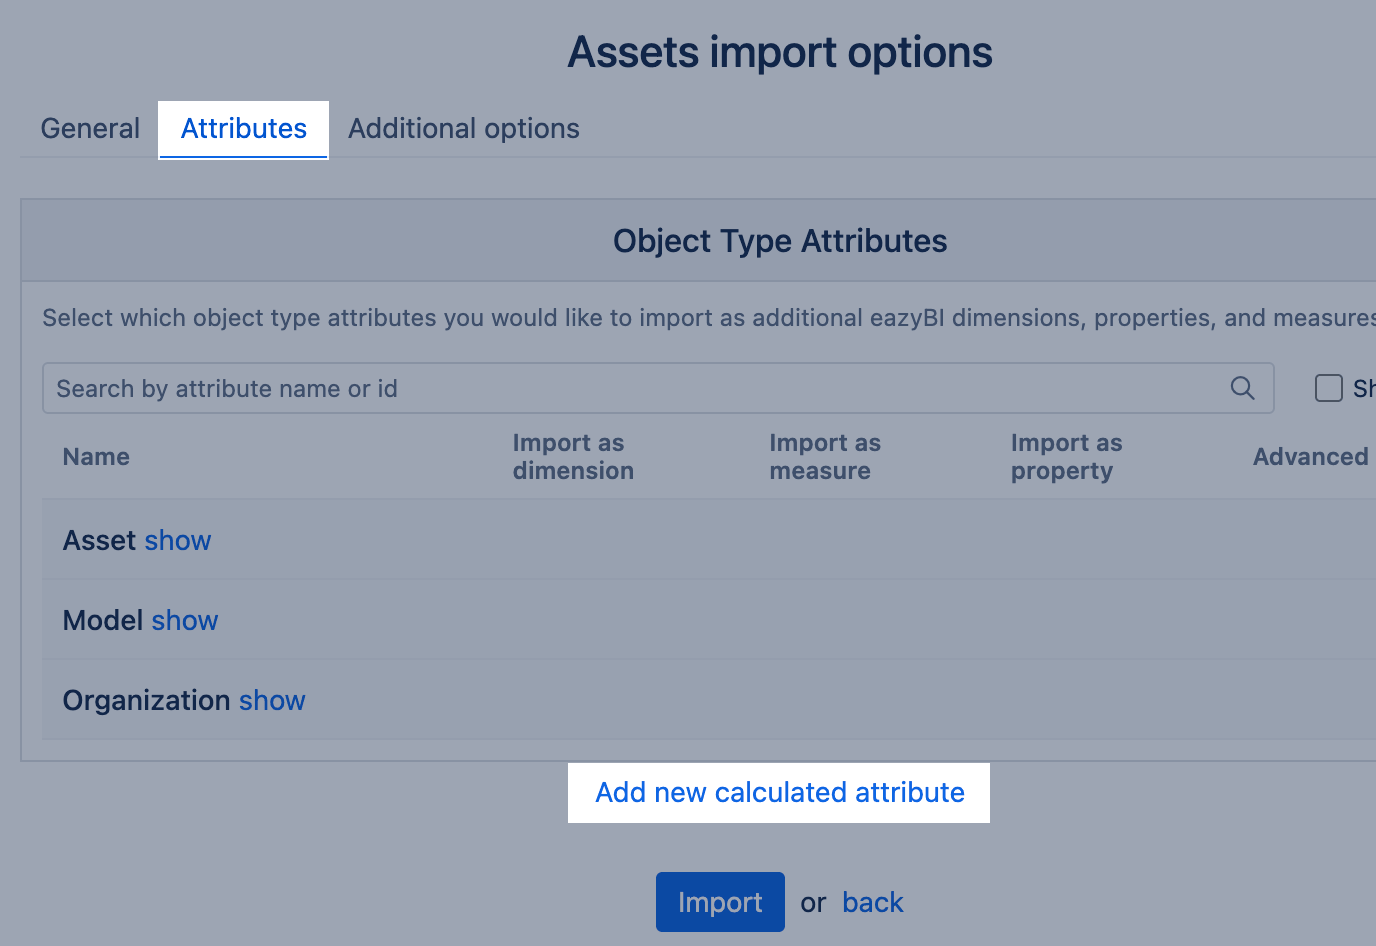
For each new calculated field, provide the configuration:
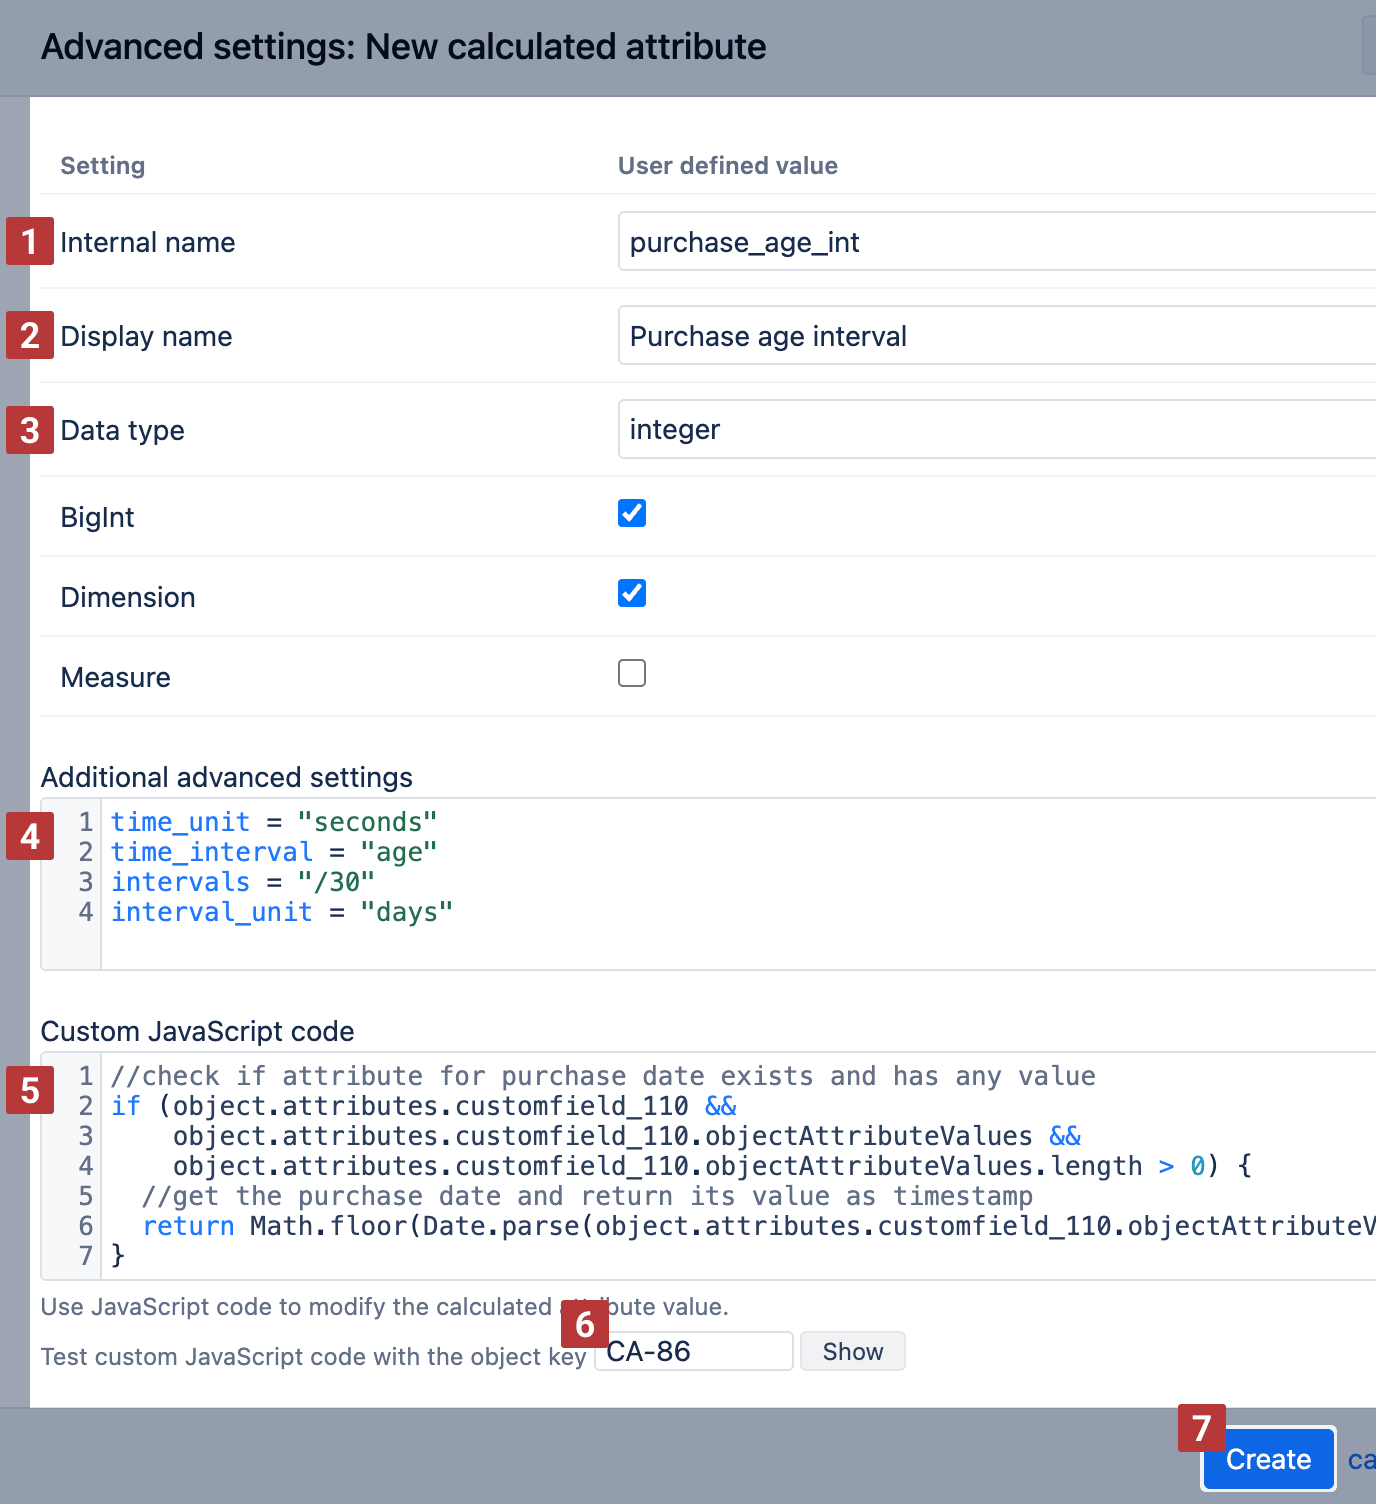
Internal name
A unique ID for the field. It should be lowercase and without spaces [1]
Display name
The name that will appear in the Attribute list and in the eazyBI report builder as a dimension, property, or measure name [2].
Data type
Choose the data type of the calculated value [3]. Data type determines how you can import the calculated field (as dimension, measure, or property) and which field options are supported for this result:
stringsupports additional settings: Limit, Dimension, and Multiple values.textdoes not support additional settings.integersupports additional settings: Measure, BigInt, and Dimension.decimalsupports additional settings: Measure, Precision, Scale, and Dimension.date, anddatetime.: supports additional settings: Measure
Additional advanced settings
If necessary, you can add them to the field behavior [4]. For example, create an interval dimension for numeric values. Or import all object properties from the "Object" dimension to a field that contains the object key.
Custom JavaScript code
Using JavaScript code, describe the logic to calculate the new value based on available object attributes [5].
- You can access object attributes using the data path
object. For example, to get the object type, use the data pathobject.object_type_name. Or, to get the value of a specific attribute use the data path:object.attributes.customfield_208.objectAttributeValues. - Use the JavaScript
returnstatement to print out the value changed with custom JavaScript code.
Once you have defined the new calculated field and validated the JavaScript code [6], click Create [7]. Then the newly calculated field will appear in the Attributes list, and you can select it for data import.
Validate JavaScript code for an account specific calculated attribute
Before saving the field, it is highly recommended to verify your JavaScript code.
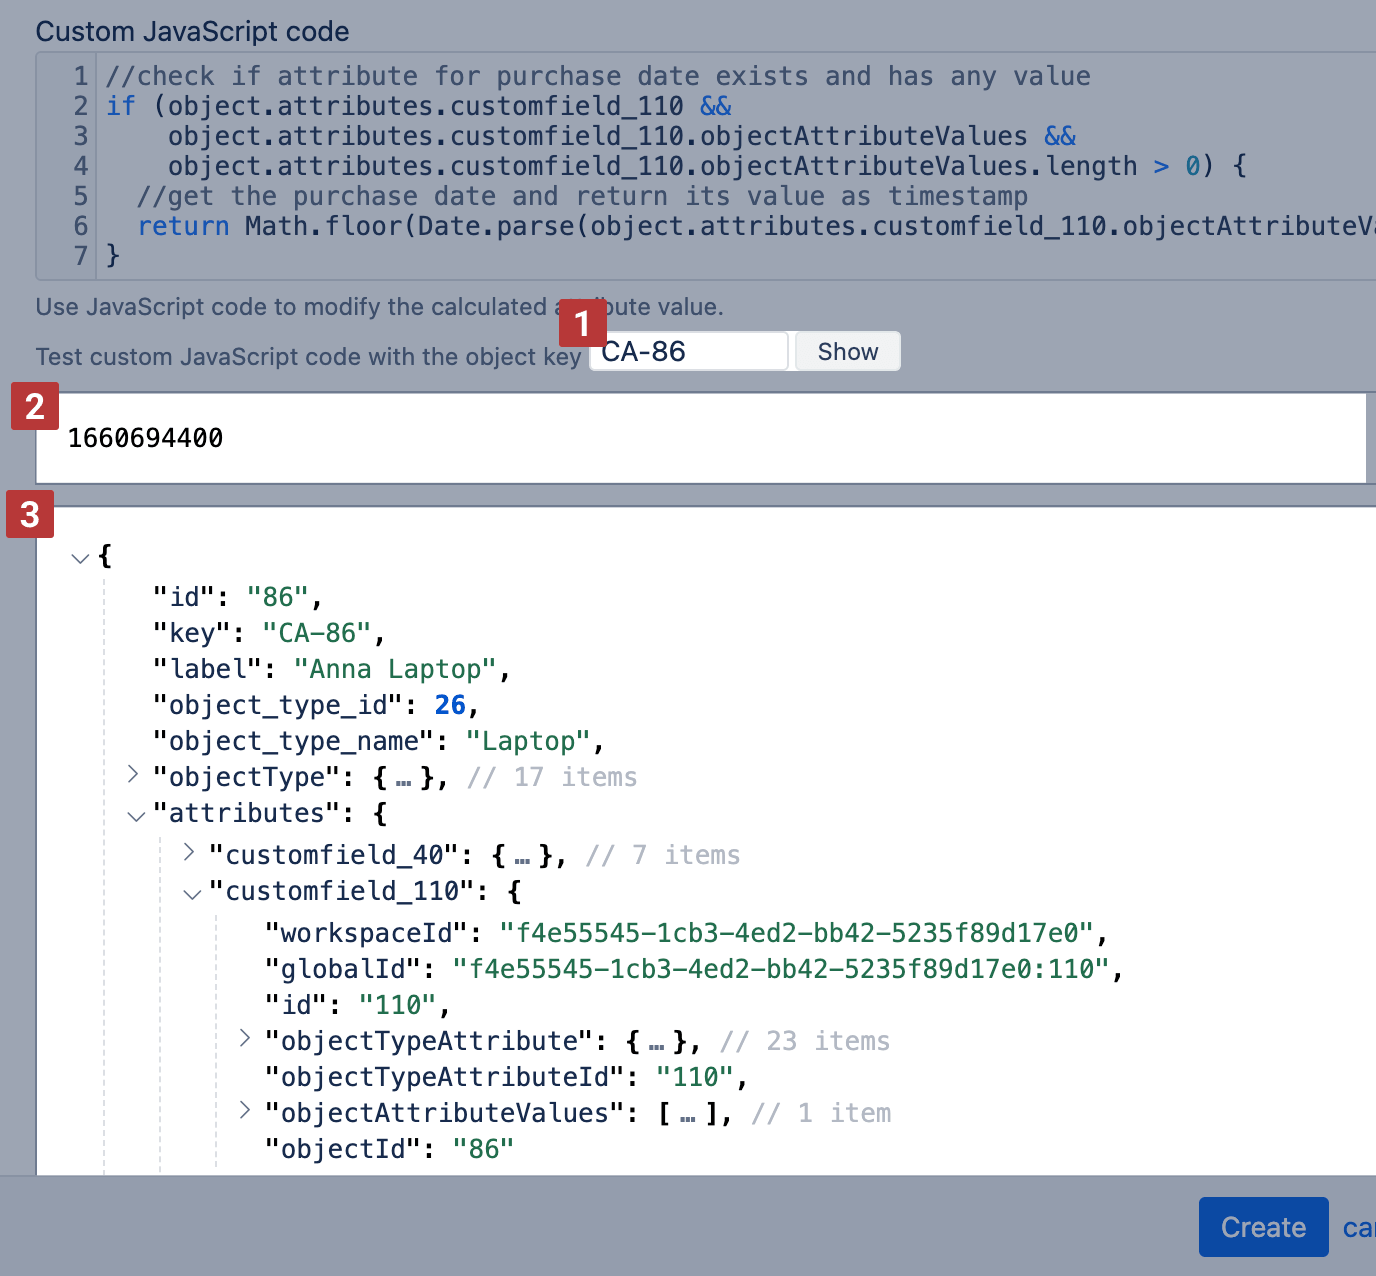
Specify an object key on which you would like to test your JavaScript code and choose Show to see the calculated results, whether the newly defined custom field results appear as expected [1]. Use at least two issues for testing, one that would get the calculated value and another to test behavior if an object does not have any required data (for an empty result).
eazyBI will show results for the custom JavaScript code [2] and the other object attributes in JSON format [3].
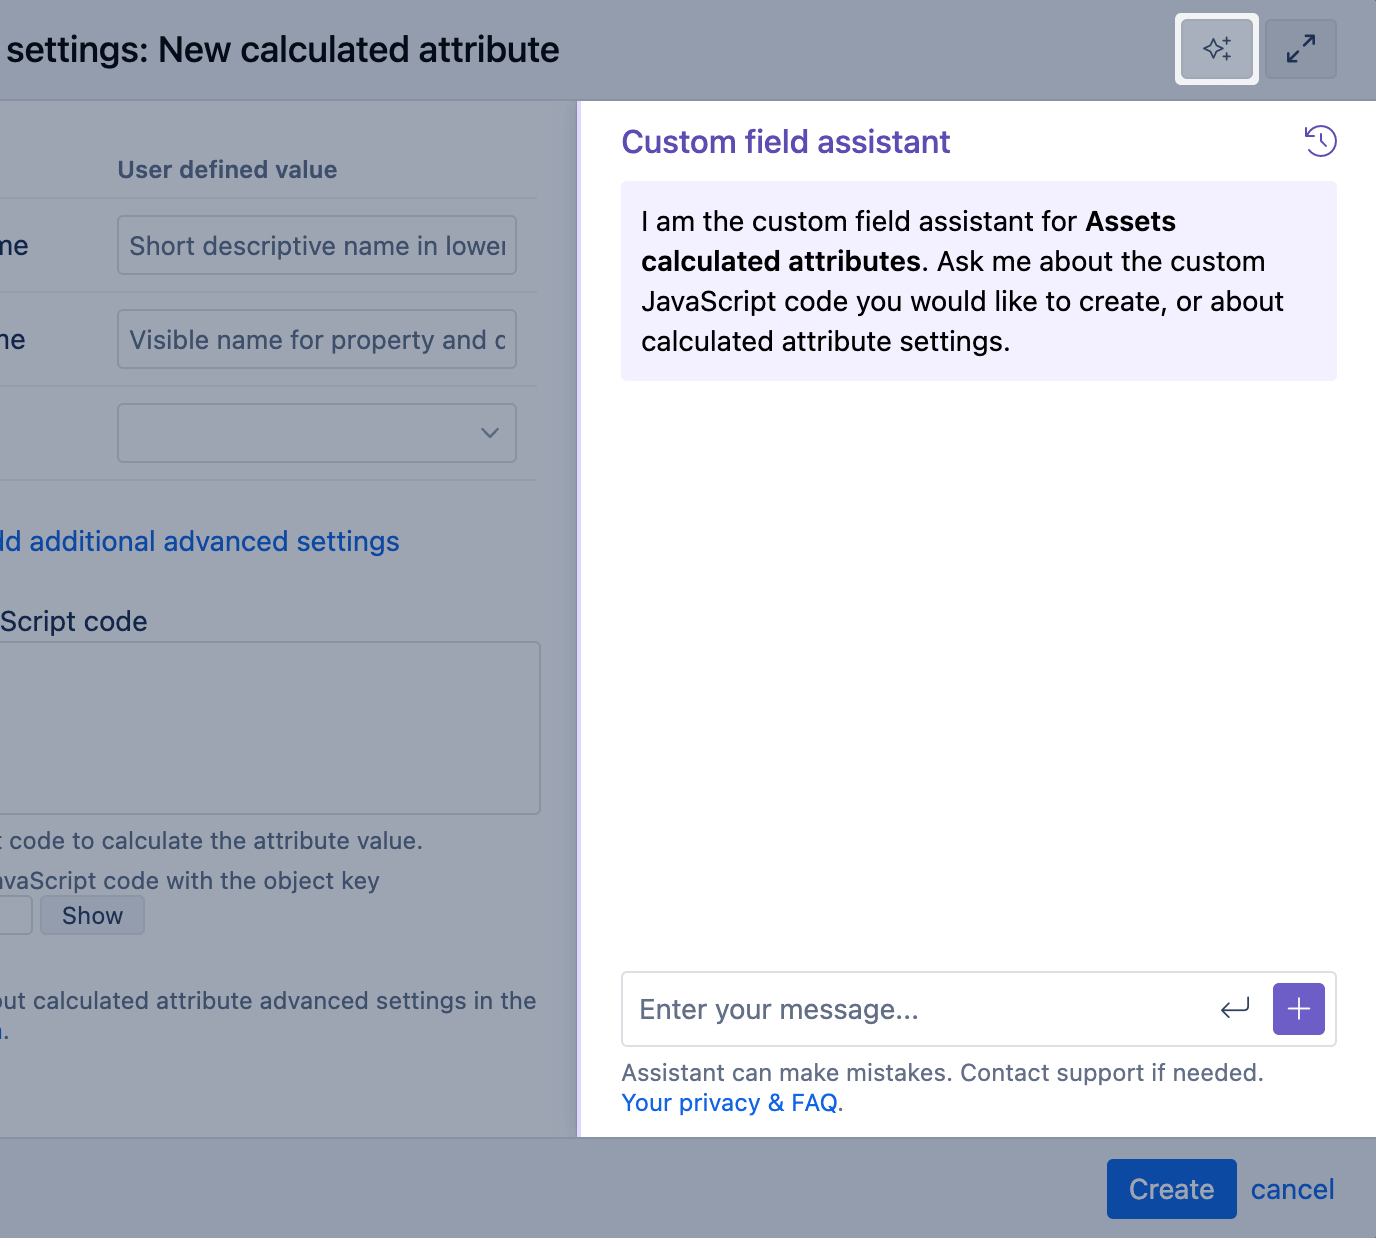
Custom Field Assistant or Assets calculated attributes
You can ask the custom field assistant for Assets calculated attributes to generate JavaScript code for a specific purpose, explain already written code, or ask about custom field settings. Writing code with an assistant is an iterative process, during which you should check the suggested code and make adjustments if necessary; this goes hand in hand with validating JavaScript code to see if the outcome is right.
Custom field assistant does not collect your data, only the prompts you are writing in the conversation window. For more details on privacy and how this works, see the eazyBI Assistants FAQ.
Examples
Merge attributes in one dimension
By default eazyBI creates separate dimension for each attribute when it is used on different objects. For example, attribute County is related to Employee and Office, then you get two dimension Employee Country and Office Country.
Create a calculated attribute to create a new dimension that merges those dimension in one.
Settings for the new attribute
| Internal name | country_uni |
|---|---|
| Display name | Country Unified |
| Data type | string |
| Dimension | ✓ |
Custom JavaScript code
// Update code and replace NNN with the attribute ID of Employee Country
// Update code and replace MMM with the attribute ID of Office Country

//check if attribute for country exists and has any value
if (object.attributes.customfield_NNN &&
    object.attributes.customfield_NNN.objectAttributeValues &&
    object.attributes.customfield_NNN.objectAttributeValues.length > 0) {
  //get the purchase date and return its value as timestamp
  return object.attributes.customfield_NNN.objectAttributeValues[0].displayValue;
}

//check if attribute for country exists and has any value
if (object.attributes.customfield_MMM &&
    object.attributes.customfield_MMM.objectAttributeValues &&
    object.attributes.customfield_MMM.objectAttributeValues.length > 0) {
  //get the purchase date and return its value as timestamp
  return object.attributes.customfield_MMM.objectAttributeValues[0].displayValue;
}
Purchase age interval dimension
You would like to see the current age of the company's assets based on their purchase dates and the distribution by age. This calculated attribute, "Purchase age interval", calculates the age in days for each asset by subtracting the purchase date from the current date. In addition, eazyBI creates an interval dimension to show asset distribution by their age groups.
Import this calculated attribute only as dimension to group objects by their purcahse age. Objects without Purchase date are grouped in (none) interval. You can edit intervals after the import too.
Settings for the new attribute
| Internal name | purchase_age_int |
|---|---|
| Display name | Purchase age interval |
| Data type | integer |
| BigInt | ✓ |
| Dimension | ✓ |
| Additional advanced settings | time_unit = "seconds" time_interval = "age" intervals = "/30" interval_unit = "days" |
Custom JavaScript code
// Update code and replace NNN with the attribute ID of Purchase date

//check if attribute for purchase date exists and has any value
if (object.attributes.customfield_NNN &&
    object.attributes.customfield_NNN.objectAttributeValues &&
    object.attributes.customfield_NNN.objectAttributeValues.length > 0) {
  //get the purchase date and return its value as timestamp
  return Math.floor(Date.parse(object.attributes.customfield_NNN.objectAttributeValues[0].value) / 1000);
}
See also
- General information about Assets import options.
- List of custom field advanced settings
- JavaScript calculated custom fields