Custom field import options
eazyBI for Jira
On this page:
Overview
Custom field import options are a convenient way to alter the default settings for custom field import. With just a few clicks, you may alter the custom field data type, enabling the option to import it as a dimension, etc. Unlike editing custom field import options in the eazyBI advanced settings, these options affect only the data import into the particular Jira issues cube.
These options are available for Jira system administrators, Jira trusted users, eazyBI admins, and eazyBI account users with roles allowing source data import. The settings are applied only within the specific Jira source application import.
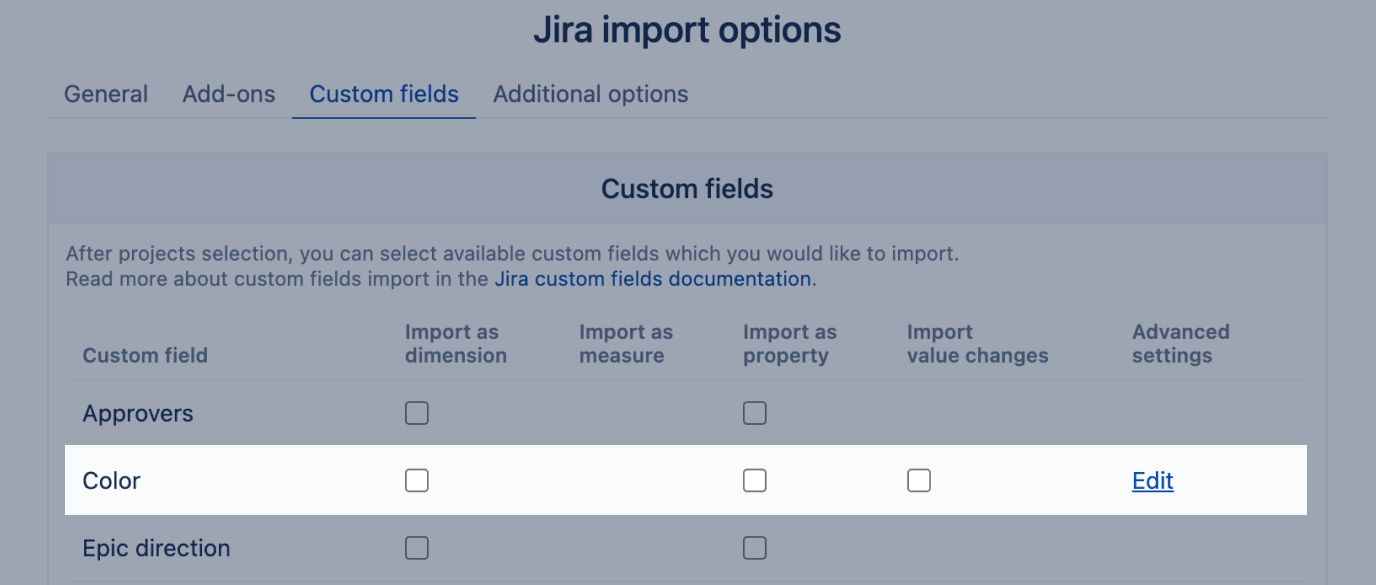
Custom field import options
You can edit advanced settings for most Jira fields, as well as for Add-on specific custom fields. Some LOCKED custom fields deeply integrated with Jira's system functionality, such as "Team", "Time to first response", and Asset custom fields, are limited or unavailable for editing.
To add custom field import options, head to the eazyBI import option "Custom fields" tab and find the desired custom field in the list (note that Jira Software, Jira Service Management, and add-on specific custom fields are listed in the General and the Add-ons tabs). Next, hover the mouse over its entry and then click on Edit. Custom fields with import-specific advanced settings or custom JavaScript code have the Edit button visible without hovering over it.
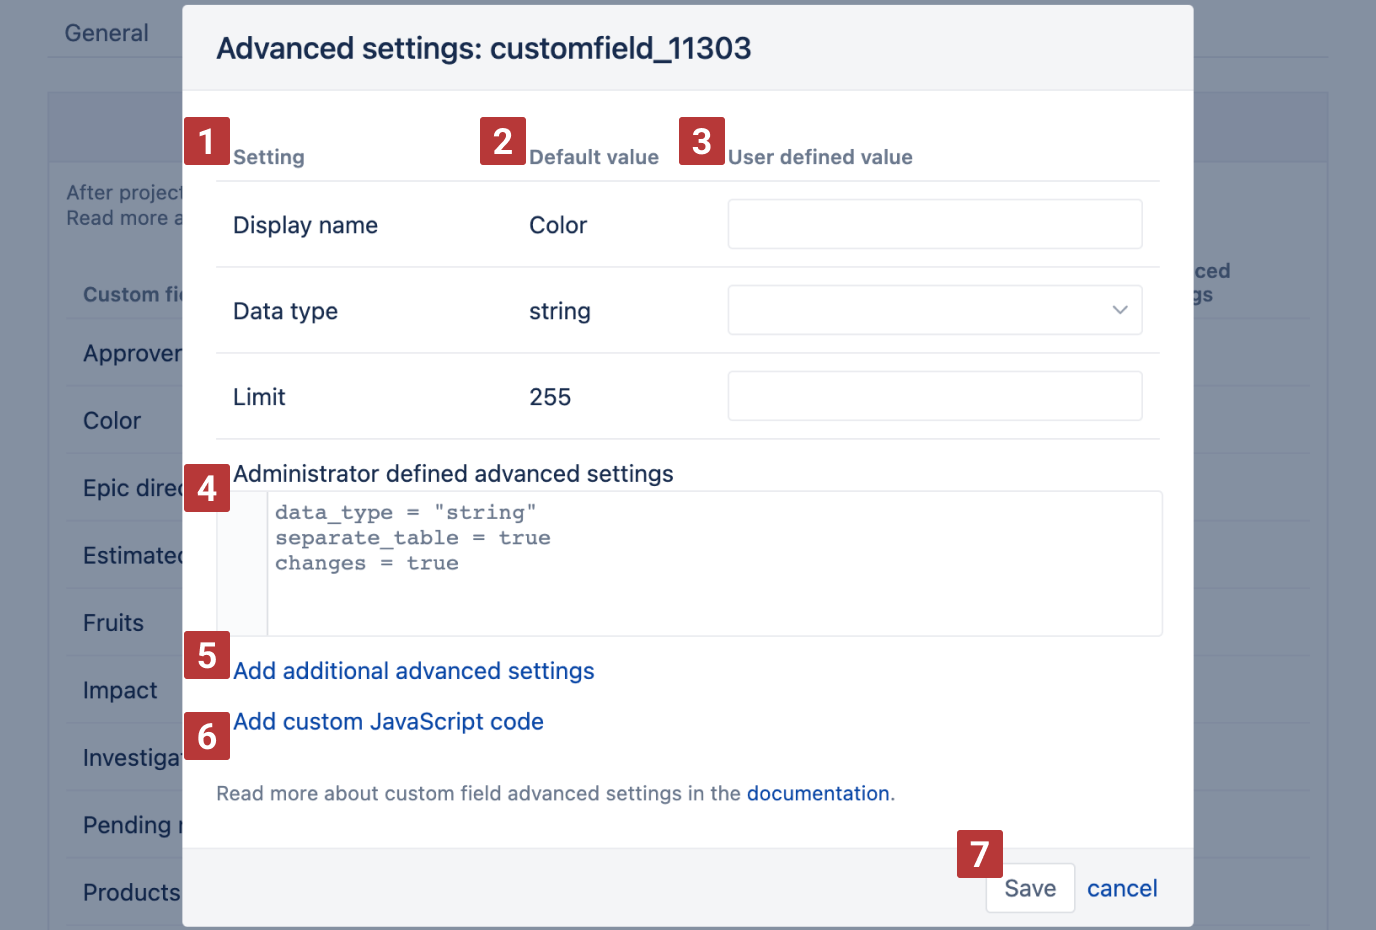
eazyBI provides some of the most frequently used advanced settings at your fingertips with easy-to-use toggles. In the Settings [1] column, you can see the settings available for change out of the box. These can differ depending on the custom field data type. The Default value [2] column displays the defaults for each setting used by eazyBI. User defined values [3] will represent the changes made by the user.
If the custom field has any settings already specified in the eazyBI advanced settings, you can see them in [4] Administrator defined advanced settings. In addition, an option to view the JavaScript code for JavaScript calculated custom fields will be available. Finally, you can specify [5] additional advanced settings and [6] custom JavaScript code for the custom field by clicking on the respective links.
Once you have defined the custom field import options, click [7] OK and see how to apply them.
Changing data type for text field
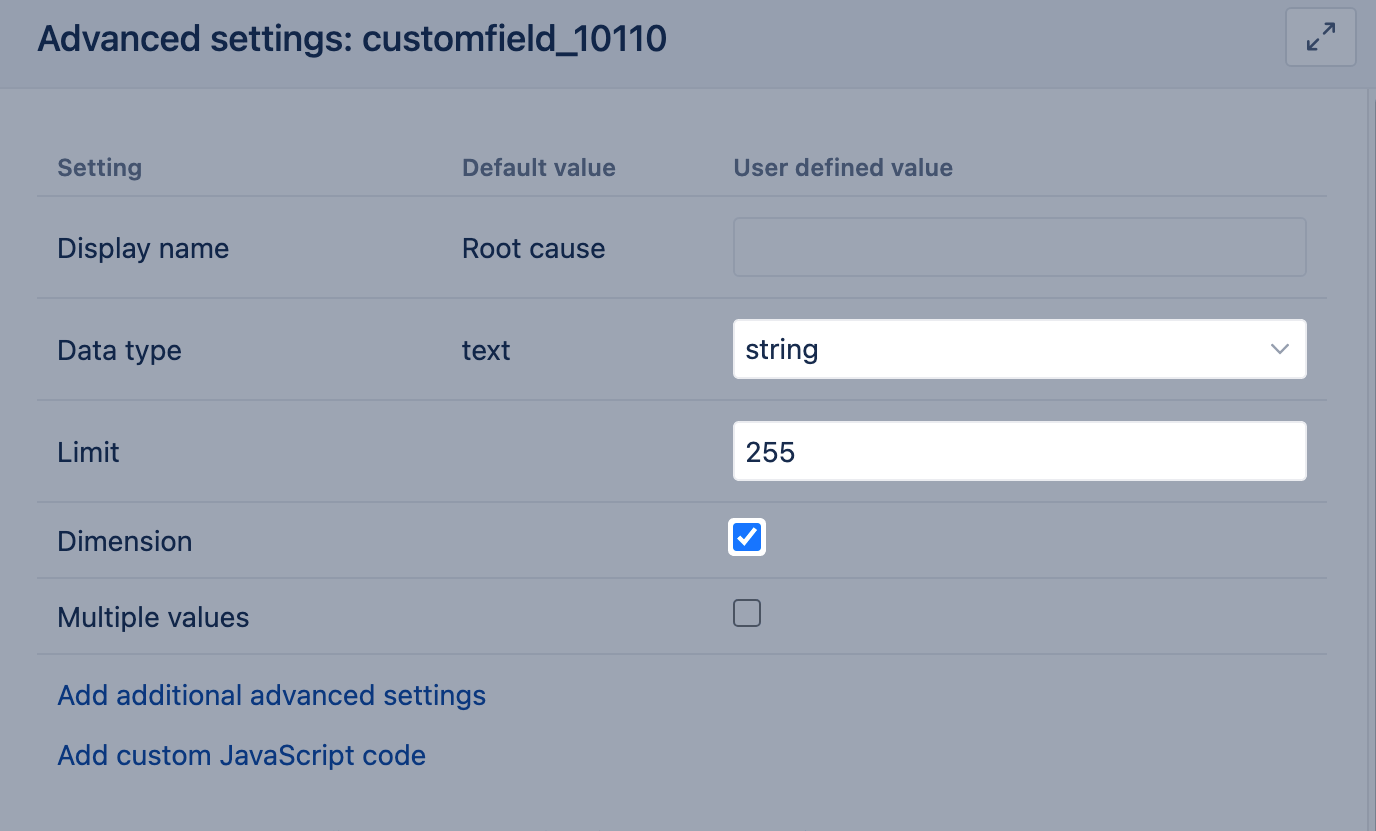
Depending on the data type, eazyBI allows you to import a field as a property and dimension or as a measure. Changing the field's data type may offer additional import options.
If you want to import a text field as a dimension, change the data type to string and enter the field limit.
If the single-line text field or select single value field contains just numeric values and you want to import it as a measure, the field values need to be prepared and converted to numbers. This is done in two steps:
- Jira system admin or eazyBI admin needs to add an additional function SetNumber on the advanced settings page. This is a one-time action.
- Once the function is defined, you can usi it in 'Add custom JavaScript code' to convert values to numbers
//replace NNNNN with your custom field ID
if(issue.fields.customfield_NNNNN) {
	str = issue.fields.customfield_NNNNN; // issue.fields.customfield_NNNNN.value if single-select custom field
	return setNumber(str);
}

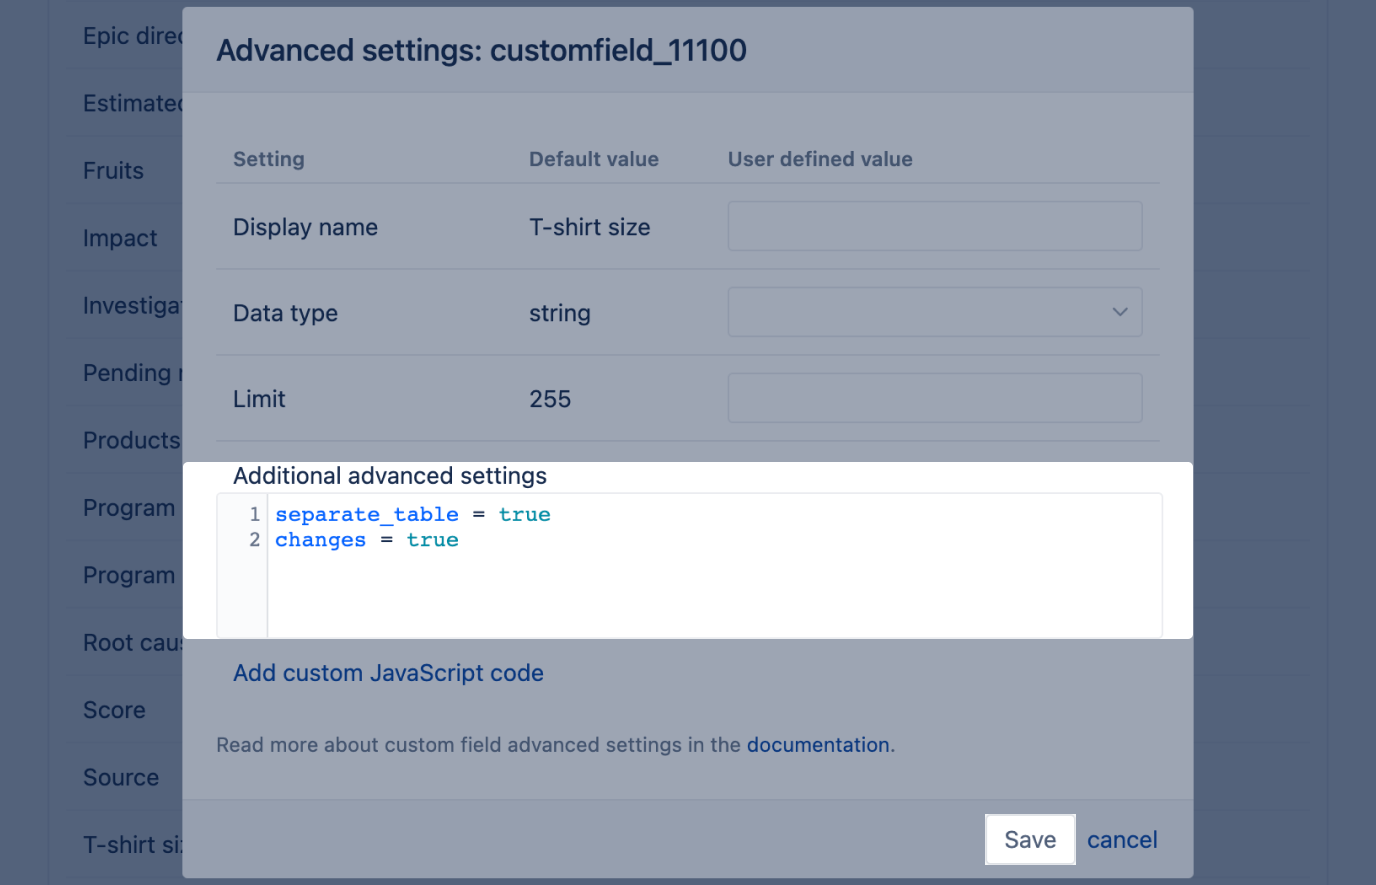
Additional advanced settings
You can change aspects of the custom field that otherwise have to be specified in the eazyBI advanced settings through the additional advanced settings. Add only the setting you want to change in the additional advanced settings. For example, to enable change history import for a single-value custom field, add the settings below:
Custom fields that don't appear in the eazyBI import options "Custom fields" tab must still be defined through eazyBI advanced settings.
Custom JavaScript code
With custom JavaScript code, you can alter the output value of the respective custom field. Alternatively, if you add a new calculated field, you would add JavaScript to calculate the preferred value. Here specify only JavaScript code that returns the desired result with the JavaScript return statement. If additional advanced settings are necessary, specify them in the Add additional advanced settings section.
Use the JavaScript return statement to retrieve the value changed with custom JavaScript code.
Below you can see an example of changing a custom field output value North to Arctic in the custom field import options.
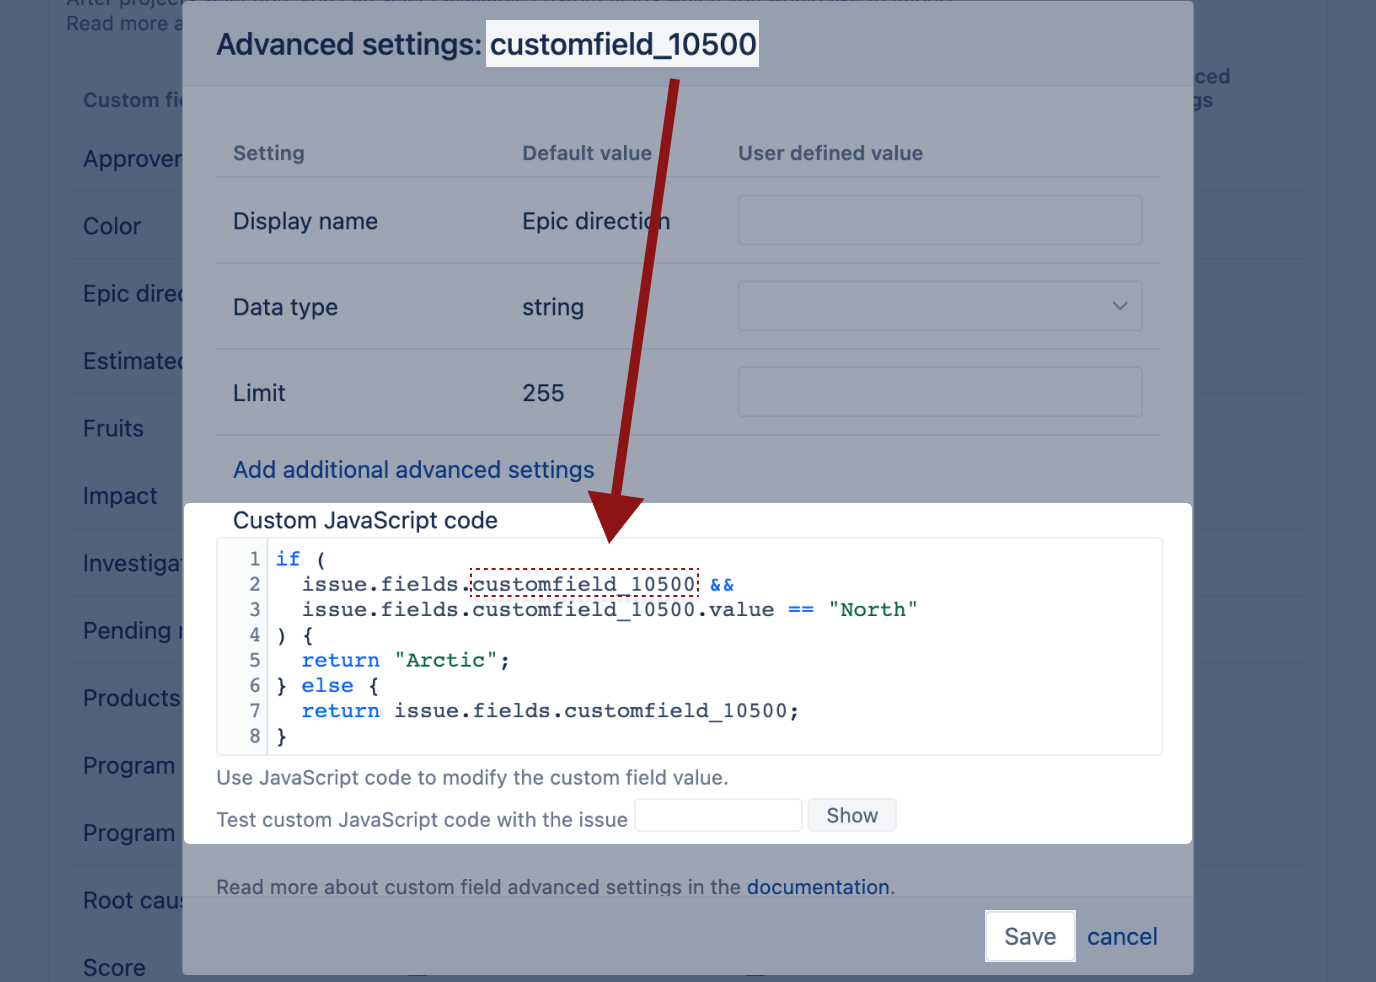
You can test the JavaScript code output and the returned value for a specific issue if the custom field is already imported. This option is similar to custom JavaScript code in eazyBI import options.
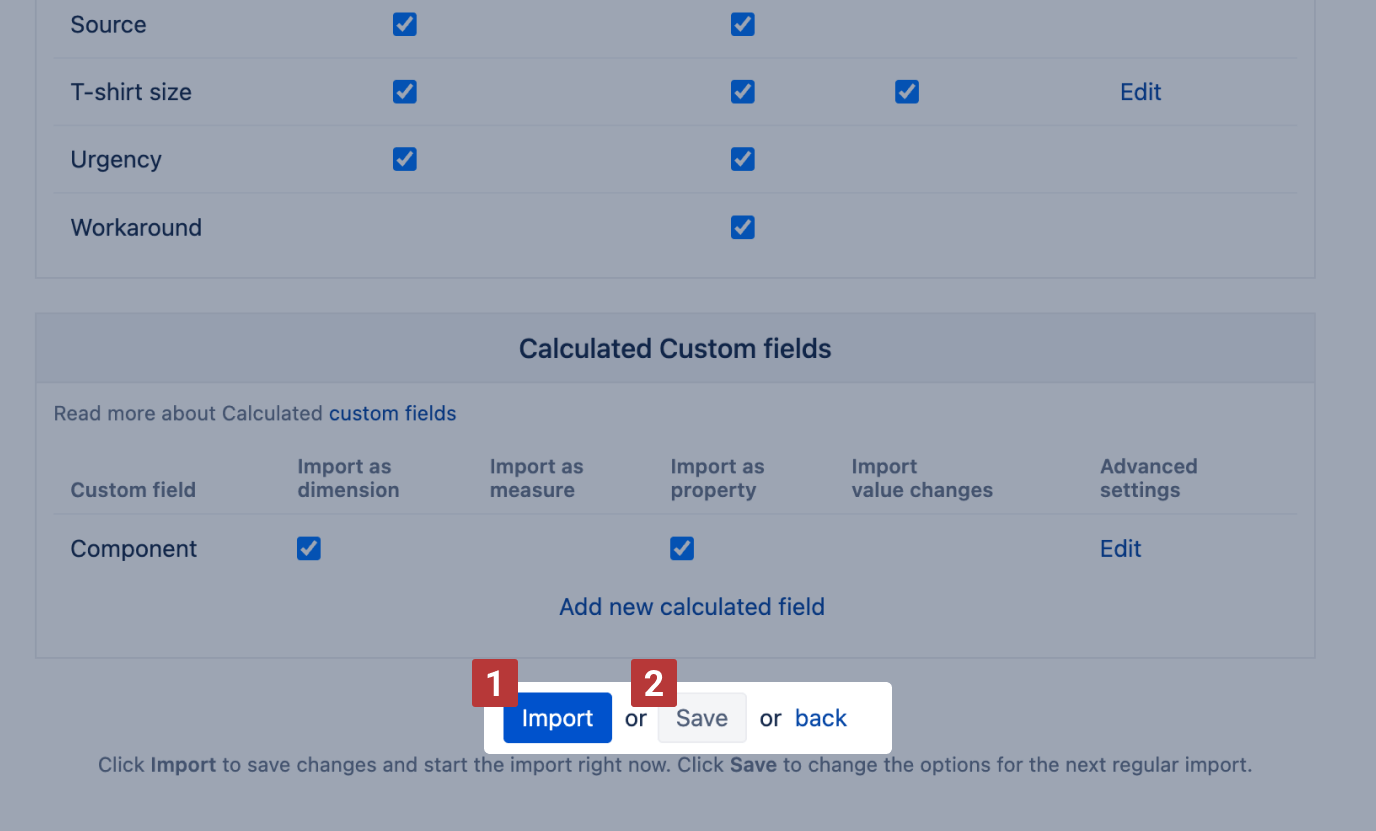
Applying and changing the options
The custom field import options and new calculated fields are saved and applied only when eazyBI import options are saved, or data is imported.
Unsaved custom field options and new calculated fields will be lost by navigating away from eazyBI import options.
Click OK in the respective field dialog to apply the specified settings or create a new calculated field. Once done editing eazyBI import options, click [1] Import to save changes and start the data import right away. Click [2] Save to keep the changes for the next regular import.
When changing settings for custom fields and calculated fields already imported, perform a double data import - deselect the custom field from import and import data. Edit the desired settings and save the changes. Then, select the custom field and import data once again. During this process, the dimension is deleted along with the imported and calculated members, and then recreated with only the imported members. You can find and restore deleted calculated members from the Audit log, if needed.