Data import in monday.com
eazyBI.com
On this page:
Initial Import
After creating an eazyBI account, you need to import into the eazyBI database selected monday.com board items that you would like to analyze.
From the Source Data tab select Add new source application and then select the monday.com.
The data import from monday.com is authorized by the user who performs the initial data import; their monday.com credentials are used to detect which items and columns could be imported in this eazyBI account and are applied to all consecutive data imports (scheduled or manual). Inactive or non-existent users can't authorize data import. If the user access rights are changed in monday.com (the user is deactivated or loses access to some of the selected boards), user authorization must be reset.

Select general import options
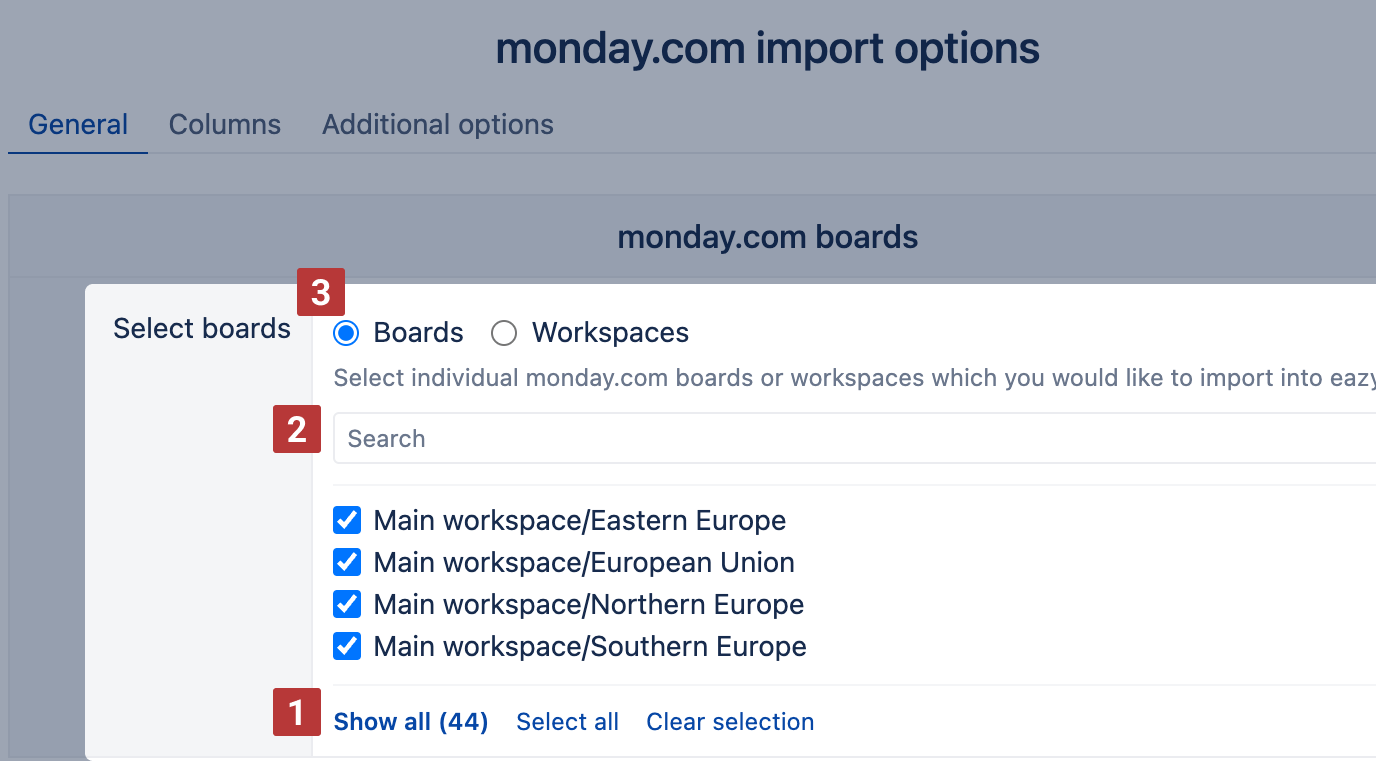
Select boards
Select which monday.com boards you would like to import into eazyBI. You can select all or individual boards and hide unselected ones, as well as clear selection [1], use the search filter to find your board [2], and even choose between Boards and Workspaces when selecting data for import [3].
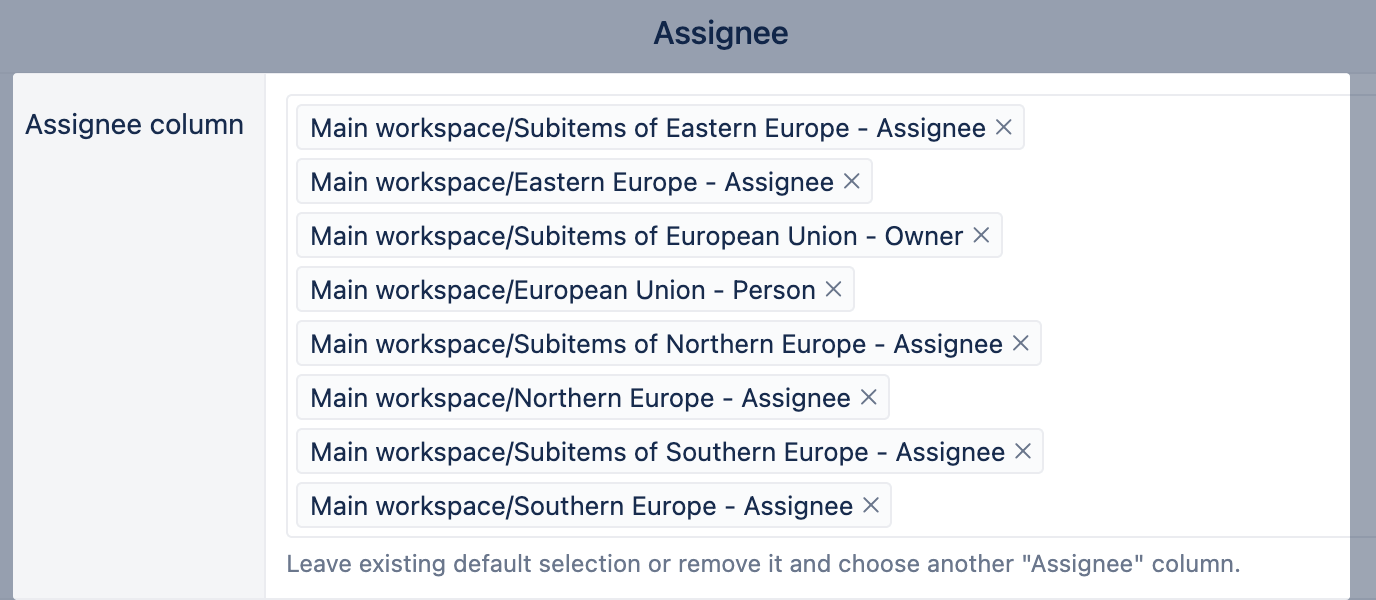
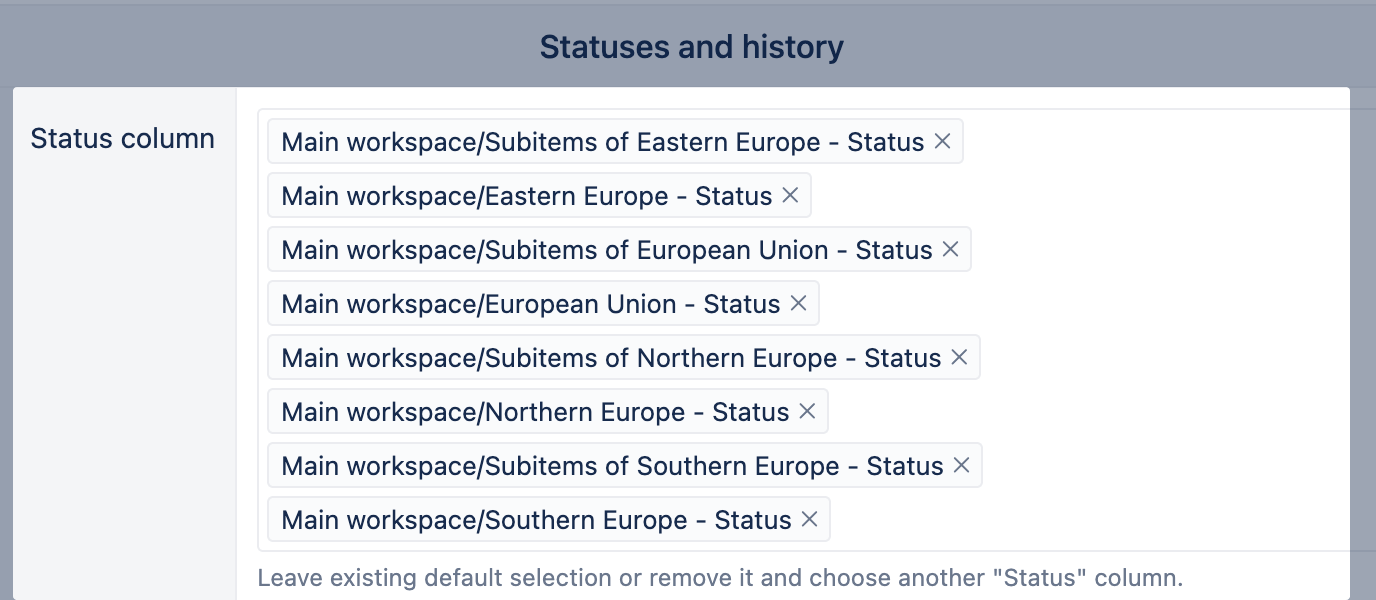
Assignee, Time Tracking, and Status columns
monday.com allows defining multiple columns in each board for adding persons to items, tracking time, and setting item status. In eazyBI, you need to define which columns from each board will be imported as "Assignee," "Time Tracking" and "Status" columns. If your boards have sub-items, then the mapping also applies to sub-item boards. Leave the existing default selection or remove it and choose other columns; the default selection treats the first columns from left containing information about persons, time tracking, and status as "Assignee", "Time Tracking", and "Status" columns accordingly.
![]()
Regular import frequency
Specify a schedule of how frequently you would like to perform monday.com data import into eazyBI. Automatical imports will process created and updated items since the last import.

Columns data import
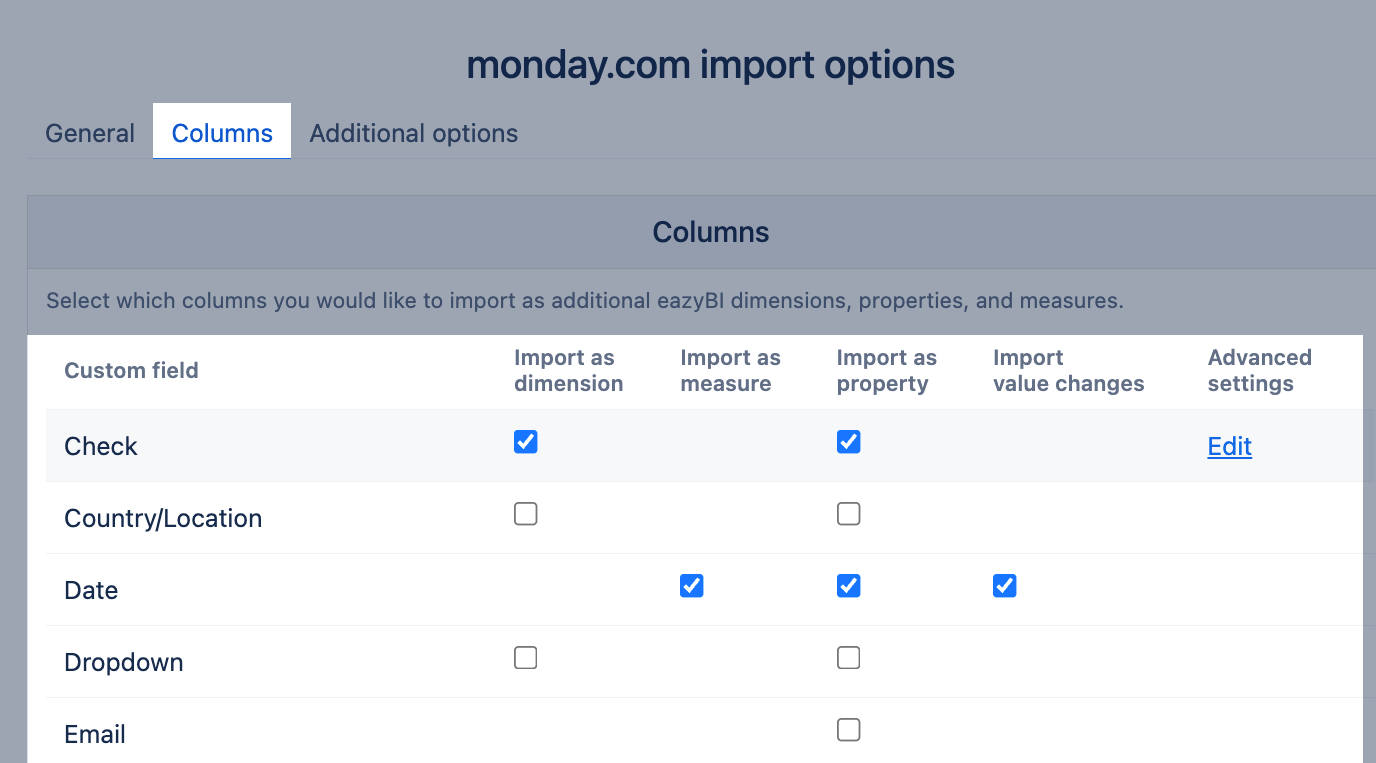
Select columns you would like to import and analyze. Columns appear in the Column tab if they relate to the boards you selected for the import. Select either individual checkboxes (Import as a dimension, Import as a measure, Import as a property, or Import value changes) or click on a column name to select all available checkboxes for this column. Available import options depend on the column type.
- Select Import as dimension if you want to analyze total numbers by column values (these columns are usually used to classify items by some parameter).
- If the column is specific for each item and you want to get this information when looking at a particular item, import as property.
- If you want to get totals of a numeric or date field, import as measure. In the result, a set of measures with totals of custom field numeric values or measures with custom date fields would be created.
- If you want to see how numeric custom field values are changed over time, then import value changes.
Columns with the same name and same type from multiple boards are grouped as one entry (dimension, measure, or property). Each column after the import has its name as you have it in monday.com; the board name appears in the parenthesis for specific values to distinguish them.
Standard column types
Numeric columns can be imported as measures and properties. Measures will be named "... created" and represented on a timeline based on item creation dates.
Date columns can be imported as measures. Measures will have names ending in "... with a custom date" and count items or values on the timeline mapped by the date. For example, a start date column for items will be imported as Items with start date. The corresponding property will be located in "Item Properties" and named Item Start Date. If there are also imported some numeric column as measure, like Amount, then measure Amount with start date will get the total amount of items by their start date.
Checkbox, dropdown type, user list, and a few other columns can be imported as dimensions. Dimensions can be used in reports to filter data in Pages or split data. For example, if you have a dropdown selection column named "Label", you can import it as a dimension. You can create reports using the Label dimension in rows or as Page filters and access the corresponding item property named "Item Label".
Currently, the following standard column types are available for import:
- Checkbox - as property,
- Email - as property,
- Phone - as property,
- Link - as property,
- Text - as property,
- Long Text - as property,
- Date - both as property and as a measure, with value changes,
- Numbers - both as property and as a measure, with value changes,
- Dropdown - both as property and as dimension,
- Label - both as property and as dimension,
- People - both as property and as dimension,
- Priority - both as property and as dimension,
- Status - both as property and as dimension,
- Tags - both as property and as dimension,
Advanced Settings for Columns
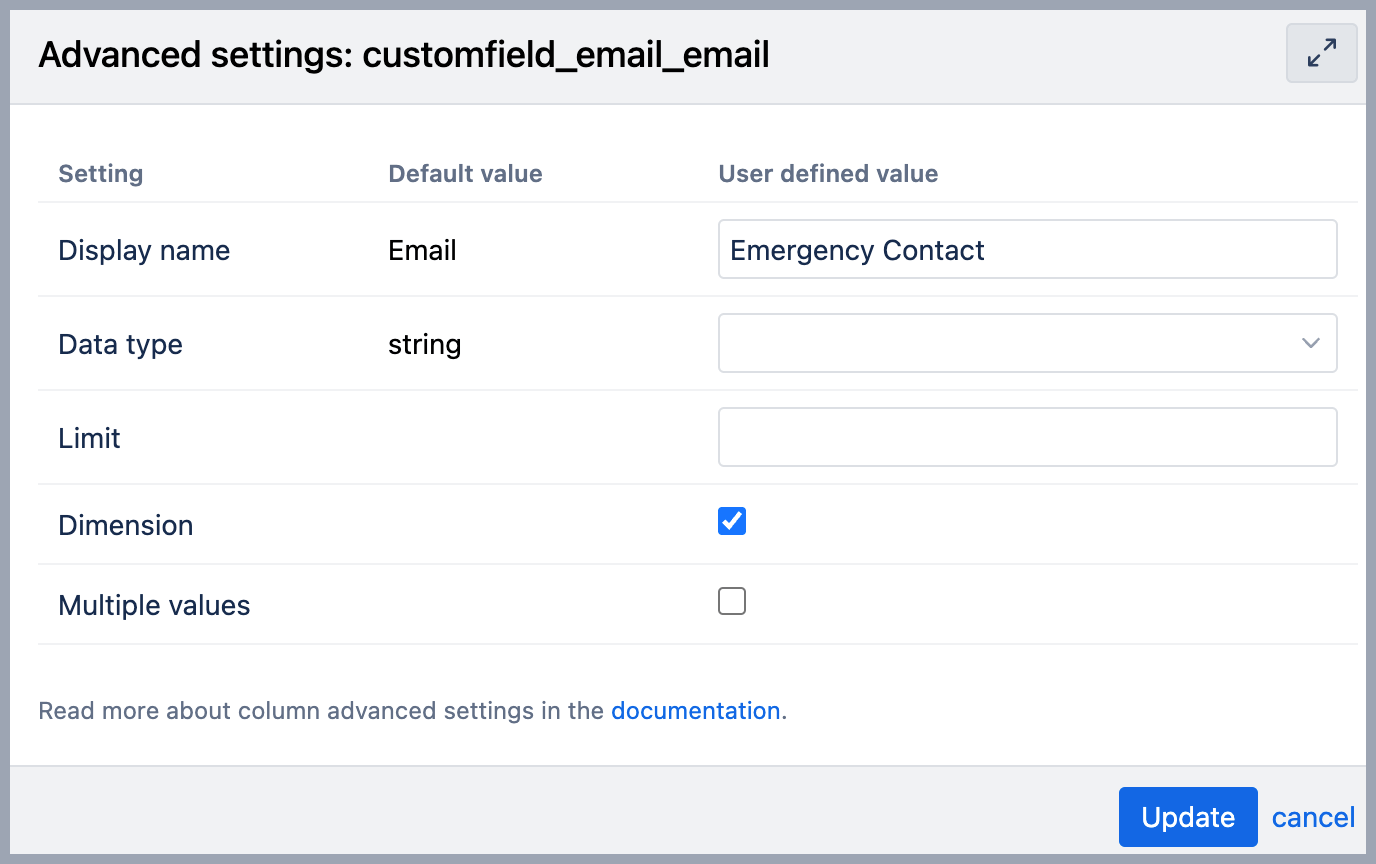
Depending on the data type, eazyBI allows you to import a field as a property and dimension or as a measure. Changing the field's data type may offer additional import options. Click Edit next to a column to open Advanced Settings. These options allow you to adjust how a column is imported beyond the default settings.
Available options:
Display name - rename the column in eazyBI reports.
Data type - change how the column is interpreted: string, number, or date. Changing the data type may enable additional import options (e.g., dimension or measure).
Dimension - Enable import as a dimension
Measure - Enable import as a measure.
Value changes - Available for numeric and date fields to track changes over time.
Limit - By default, string values imported as dimension members are limited to 255 characters. Use this setting to increase the limit and avoid truncation.
Multiple values - Enable when the column returns multiple values (an array). If the values are stored as a concatenated string, use the Split by setting to separate them.
Split by - Specify a character used to split a single string into multiple values. For example, if Split by is set to
,, the valuea,b,cbecomes an array of three separate valuesa,b,c.Precision - Total number of digits before and after the decimal point for decimal type fields.
Scale - Number of digits after the decimal point.
If you have modified column settings and the changes are not reflected in eazyBI reports after import, perform full data re-import to apply the new configuration This ensures eazyBI reloads all data using the updated column.
Additional import options
Time dimension
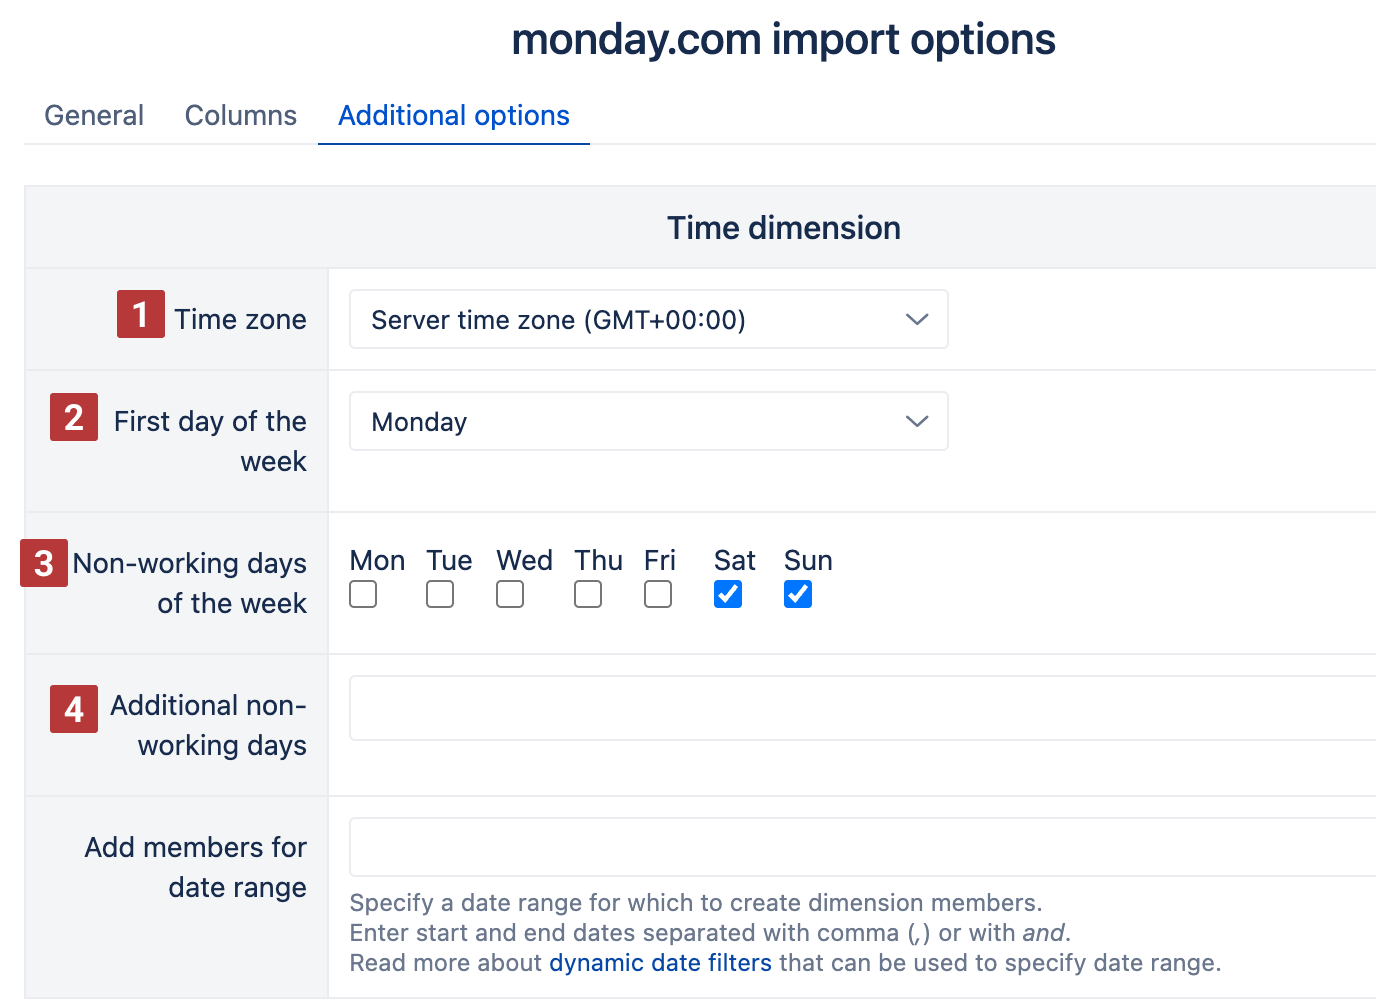
You can specify the time zone [1], the first day of the week [2], and non-working week days [3] and additional holidays [4] of the Time dimension.
You can set one time zone in each eazyBI account. It will be used to determine the date member in the Time dimension when importing measures (e.g. Items created, Items done, Hours spent, and others) and item properties. We recommend specifying the time zone to convert all timestamps during data import. If a time zone is not specified, the default server time zone will be used (GMT+00:00).
The first day of the week is used for the Time dimension Weekly hierarchy.
Non-working days (standard non-working days of the week and additional non-working days/holidays) will be used to calculate the measures calculated in workdays – Average done workdays, Workdays in transition status, Average workdays in transition status. Non-working days of the Time dimension will also be used for DateDiffWorkdays and DateAddWorkdays MDX functions as a default non-working days argument.
If you have a long list of additional non-working days, you can copy the list and use it in other eazyBI account options.
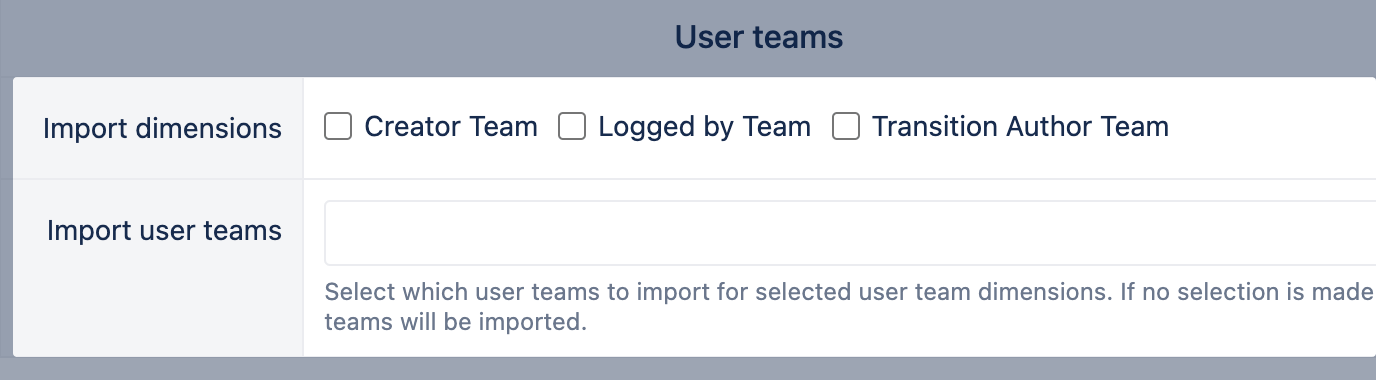
Additional dimensions for user teams
You can import user teams as dimensions.
Sample reports
Select the option "Import sample reports" to get a set of reports and a dashboard created by eazyBI and have a first look at your data in eazyBI. The option can be disabled; then, sample reports and dashboards will be deleted.

Data import and import status
After specifying import options, click Import to start the monday.com item import background job.
In the Source Data tab, you will see the current status of the monday.com import background job, as well as additional information: when the data cube was created, workspaces and boards imported in this cube, and a user whose credentials are used to authorize monday.com data import.

If you have selected many monday.com boards and columns for import, the initial import might take longer to complete. In the Status column, you will see how many items have been imported to estimate completion time.
Some data problems might not stop the import, but they will display in the warning message for the import status. The warnings remain visible to the user until dismissed manually. If you see such a warning, check if you can fix the data, dismiss the warning and rerun the import to have all your data imported.
Incremental import
After each successful monday.com item import, eazyBI will store a timestamp for processed monday.com items.
During regular monday.com data import (either manual or automatic), eazyBI will import only those monday.com items which have been created, updated, or deleted since the last import. Incremental monday.com data imports are much faster than the initial import.
If you change import options (for example, add an additional board or select additional columns), eazyBI will force a full re-import of all monday.com items.
Edit import options
You can change the import options whenever needed: select other boards or columns, change import frequency, or enable/disable options. Go to the Source Data tab and click Edit to open the import options screen.
When import options are modified, click Import to start manual data import with applied changes or click Save to save them for later (the new options will be applied during the next regular import).
If you unselect boards from data import into the account, then it is advised to perform full data re-import. Otherwise, dimension members related to the previously imported boards are still available: while they have neither any related issues nor measures, their availability could confuse customers.
Delete members without data
You can delete members without data from dimensions in the Issues cube on Cloud and since eazyBI version 8.1.
You can delete members with no data from the Items cube for the following dimensions:
- dimensions: Item Type, Status, Logged By, Transition Status, Transition, Transition Author, Creator Team, Logged by Team, Transition Author Team;
- columns: dimensions imported from status and tag columns.
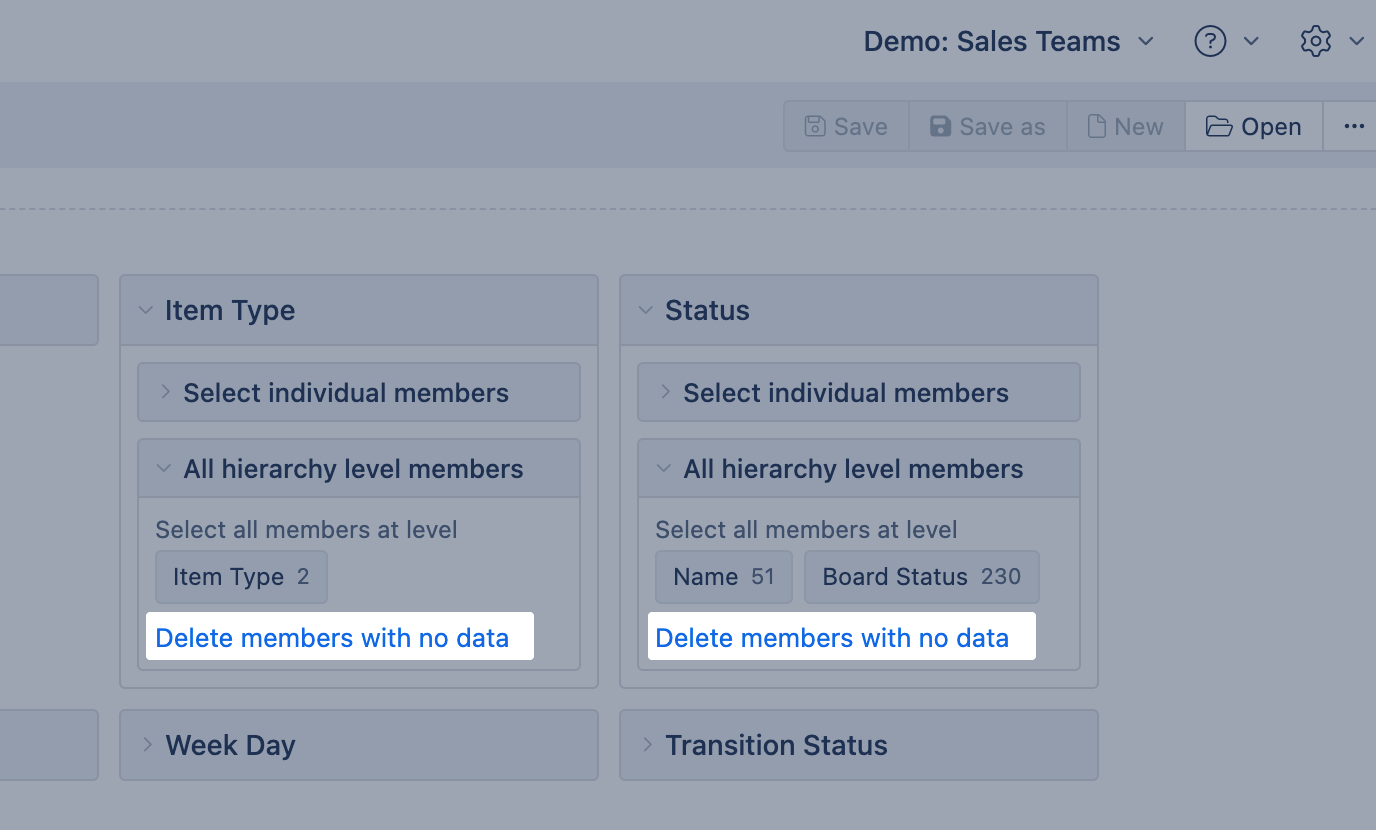
It requires a data admin user role or higher to delete members without data.
Re-import all data
Sometimes, you may want to reimport just data (measures). Items are not being deleted during this import, and reports will not appear empty until the import is completed.
This import would not delete dimension members but add newly created ones. This can be useful when a numeric field is changed in monday.com.
To re-import all data, go to the Source Data tab and click Re-import all data.

Empty the cube and re-import all items
Sometimes you would need to recreate all dimension members (for example, a new column value in monday.com is renamed and used for issues). Reports may seem empty during this import as it initially reimports all items (and other dimension members).
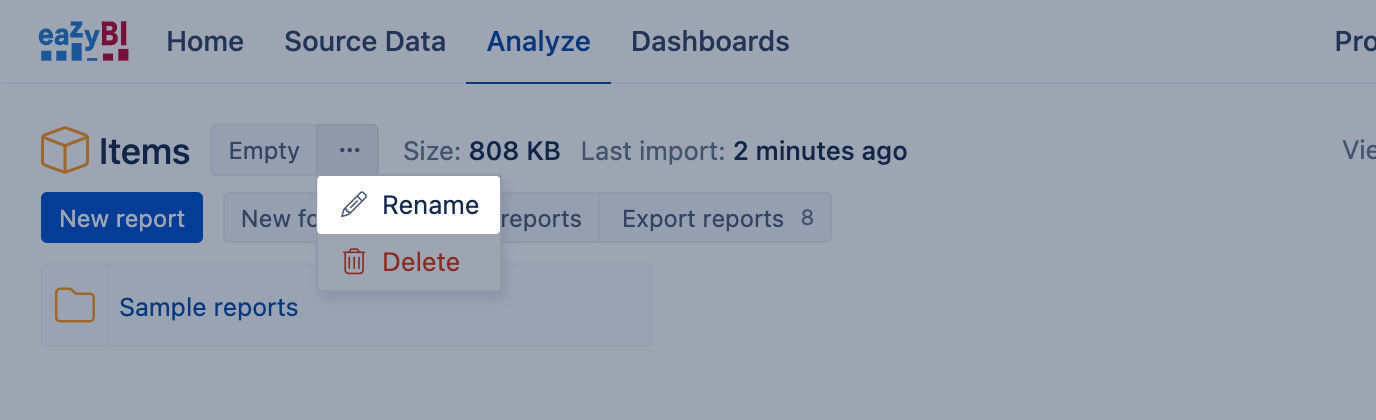
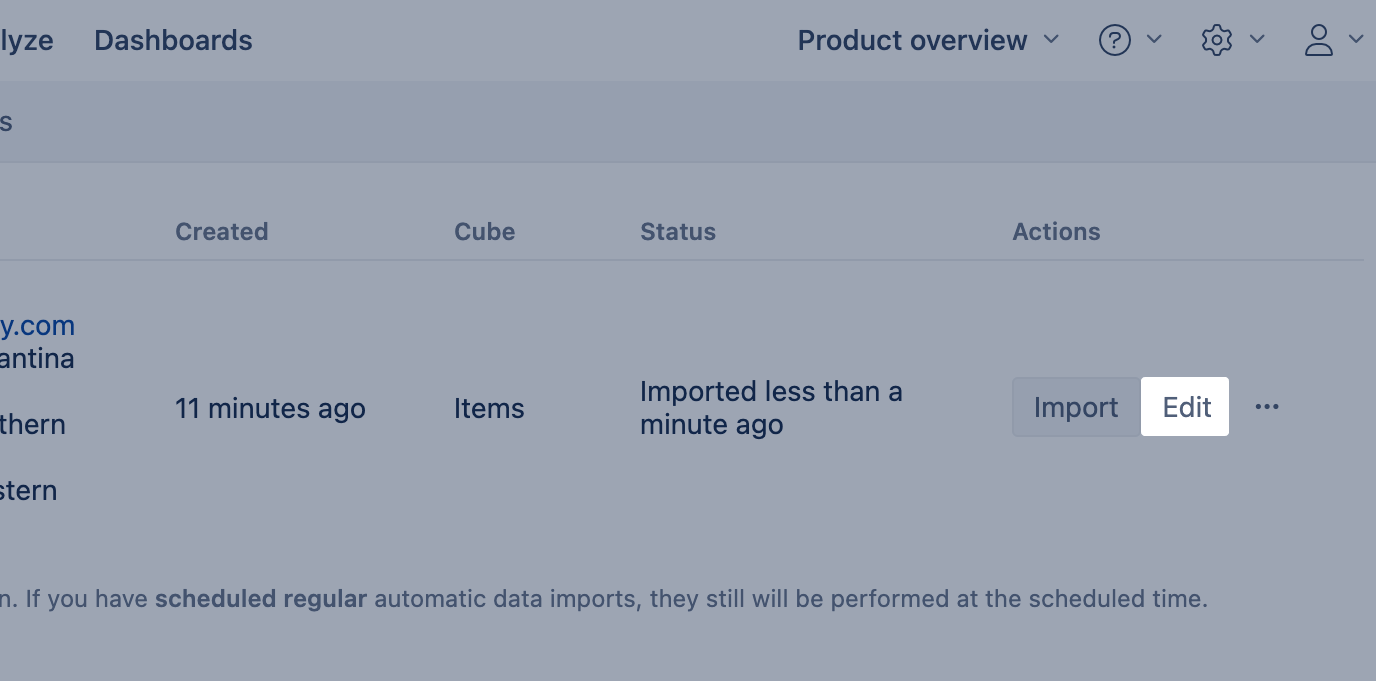
To re-import all items, go to Analyze tab and click Empty button for the Items cube (it will delete just imported data, but all created reports and calculated members will remain).
![]()
And then, return to Source Data tab and click Import to start a new re-import of all data.
![]()
Reset authorization
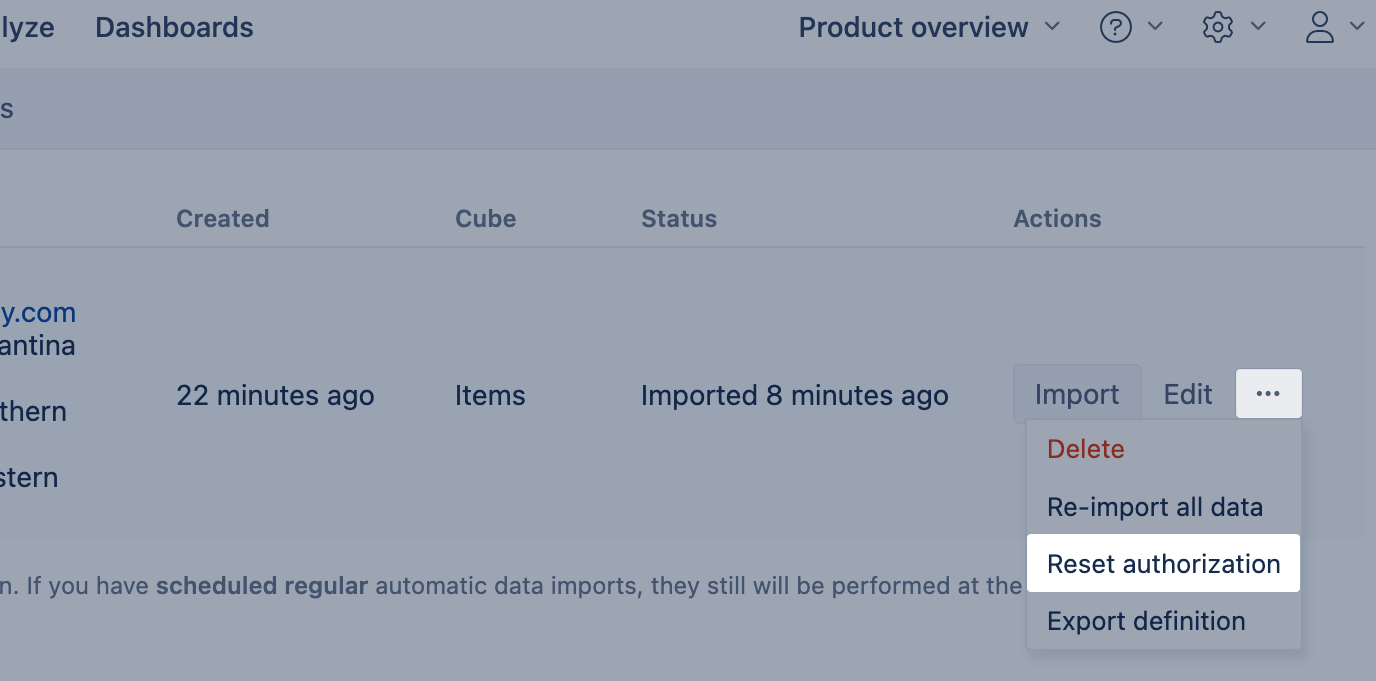
When the user who had initially authorized monday.com for data import is not available anymore (is inactive) or does not have permissions to the needed boards, data source authorization should be reset to another user; otherwise, the next data import won't be successful (will end with error).
The new user has to be added to the account with Owner, User Admin, or Data Admin account user roles. They should log into eazyBI, open the Source tab, and click Reset authorization.
After approving this action, the Status will be changed to "Authorized".
Open Edit import settings to select boards and columns available for the new user and perform data import.
After resetting authorization, the user should run the first import manually. After the first manual import, imports will run as scheduled automatically with the new user credentials.
Export source application definition
With the monday.com source application definition export, you can share the monday.com import options from one account across one or several others. We recommend using this option within the same eazyBI instance to ensure the same set of available boards and columns. Typical use-cases are when you would like to copy the settings of one account and use them on a different set of boards or create a sandbox account to try out new solutions.
To export the definition of monday.com source application, open the Source data tab, and click Export definition. Copy the definition.
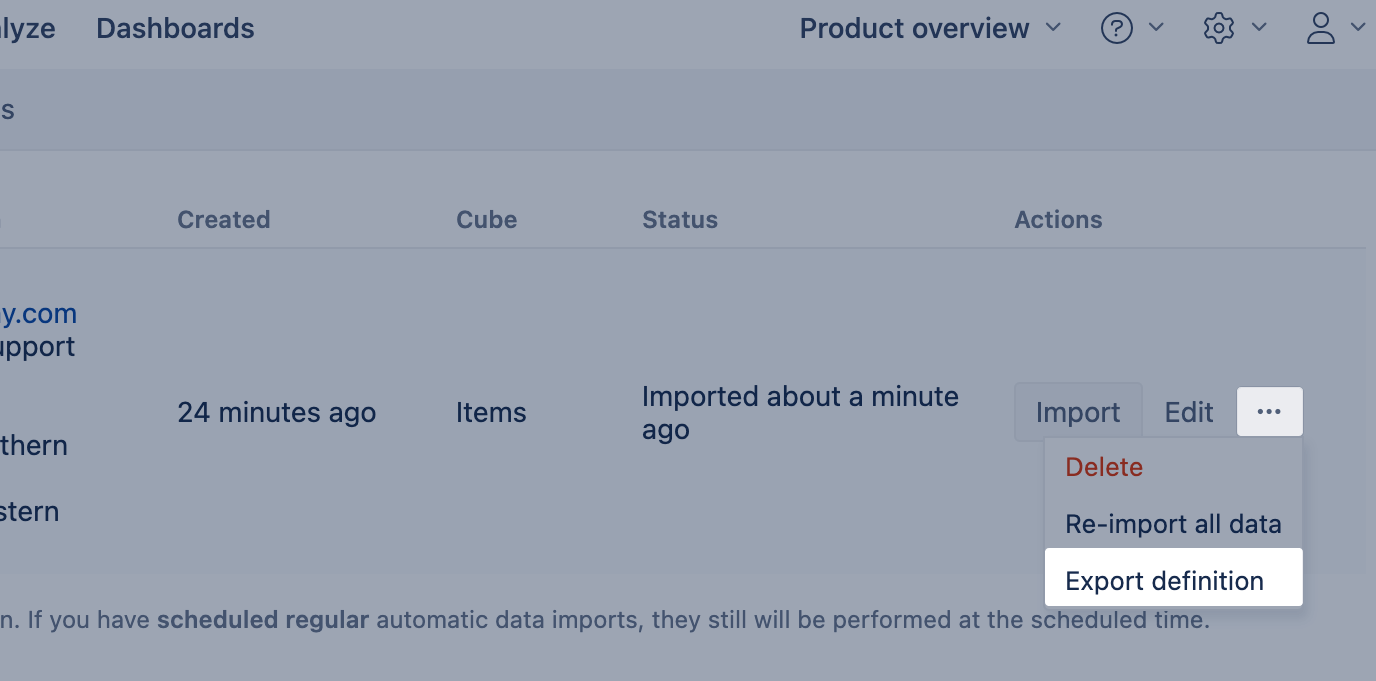
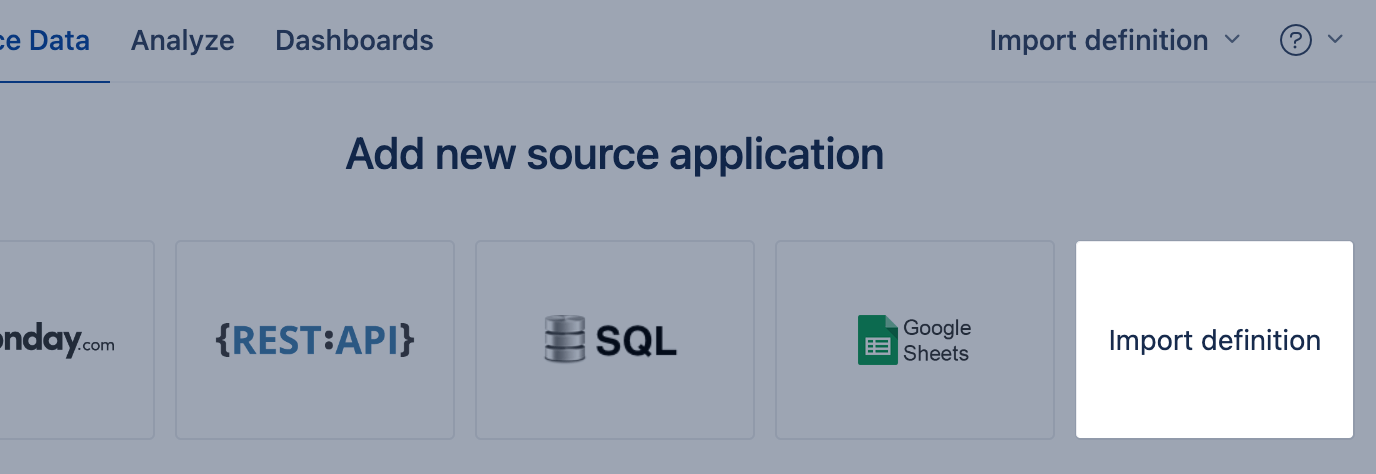
To import the definition, create a new eazyBI account or open an existing one without a monday.com source application. In this account, add a new source application and click on Import definition. Paste the definition and click Create.
Rename data cube
When you add monday.com as a data source and import data, eazyBI creates a data cube with the default name "Items". However, you may rename the cube from Analyze tab.