Additional data import into Jira Issues cube
eazyBI for Jira
You can enrich the Issues data cube with additional data from external data sources, like files, REST API, or SQL SELECT to a database. This way you can import new measures and new properties to Issue dimension members.
Please at first read about eazyBI cubes, dimensions and measures as well as the eazyBI Jira data model - you will need to understand the multi-dimensional data model to be able to map new source data columns to cube dimensions and measures.
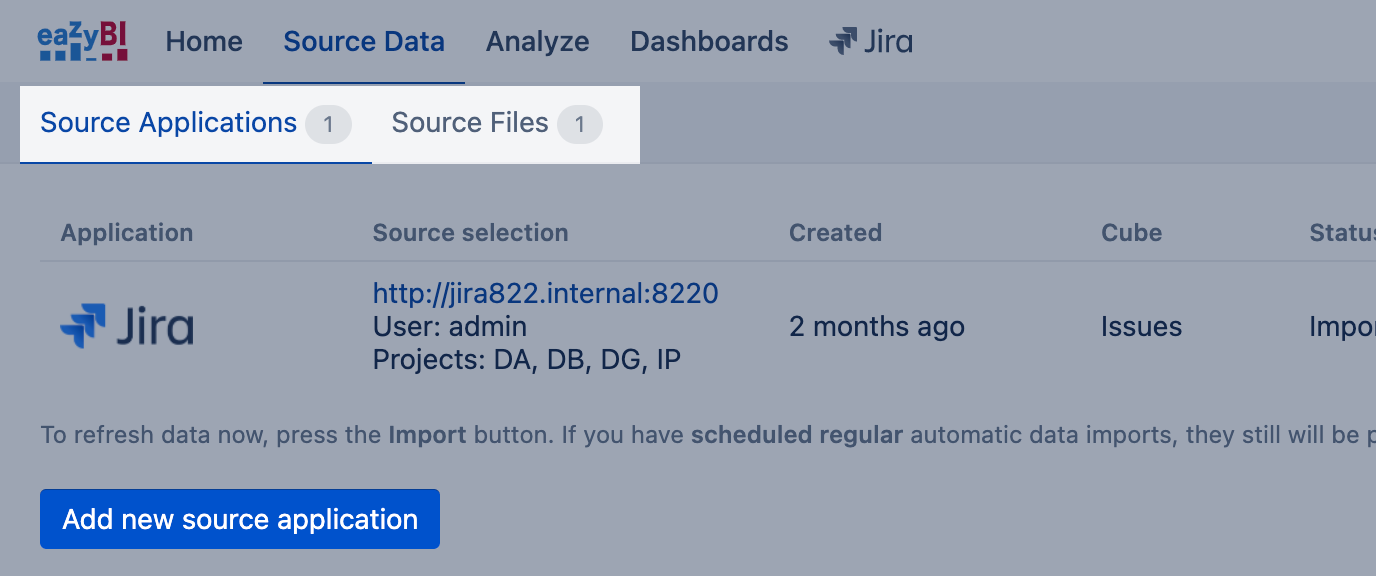
From Source Data tab select Add new source application or Source Files tab to upload new source data.
On this page:
Source data preparation
Before data import, it is necessary to see if the source data have a column by which eazyBI will be able to find members you would like to map imported measures or properties. It should be either Project key, Issue key, Time dimension (see which date formats are recognized by eazyBI as date or date-time), full Sprint name, or any of the member IDs or names matching the eazyBI dimension member names.
If you have selected any of the source applications, please first follow the source parameter specification
No source parameters are necessary in the case of source file upload; you can proceed directly to preview the data that will be imported.
Column mapping
The next step is column mapping to Jira dimensions and defining what will be the new measures and properties.
First, select the Issues cube you want to import data into [1].
Then specify to which dimensions you would like to map the imported data [2]. Select dimension and dimension hierarchy level from the available dimension list of standard-issue field dimensions and single select custom fields (for more details see Mapping to single value custom field dimensions below). In the example. there is a Project column mapped to the Project dimension, Project hierarchy level and t means data are mapped to the projects in the Project dimension.
In advanced options, specify whether the column contains Name or Key values by which eazBI can find each dimension member [3]. In the example, the Name column is selected because the projects in this column have the name specified exactly as this project name is in eazyBI and this is how eazyBI will be able to find to which project each of the Measures or properties should be imported.
Usually, an external data source is not identical to data in eazyBI and might contain data on projects, persons, or issues that are not imported into the particular data cube. eazyBI throws an error if the external data source has rows that do not have a match in the selected dimension and additional data import stops. To handle those use cases and complete data import for matching data, select the advanced option Skip missing [3]. If eazyBI does not find a Project member with such name as is in this column, the data from that row is not imported this time and eazyBI proceeds with the next row.

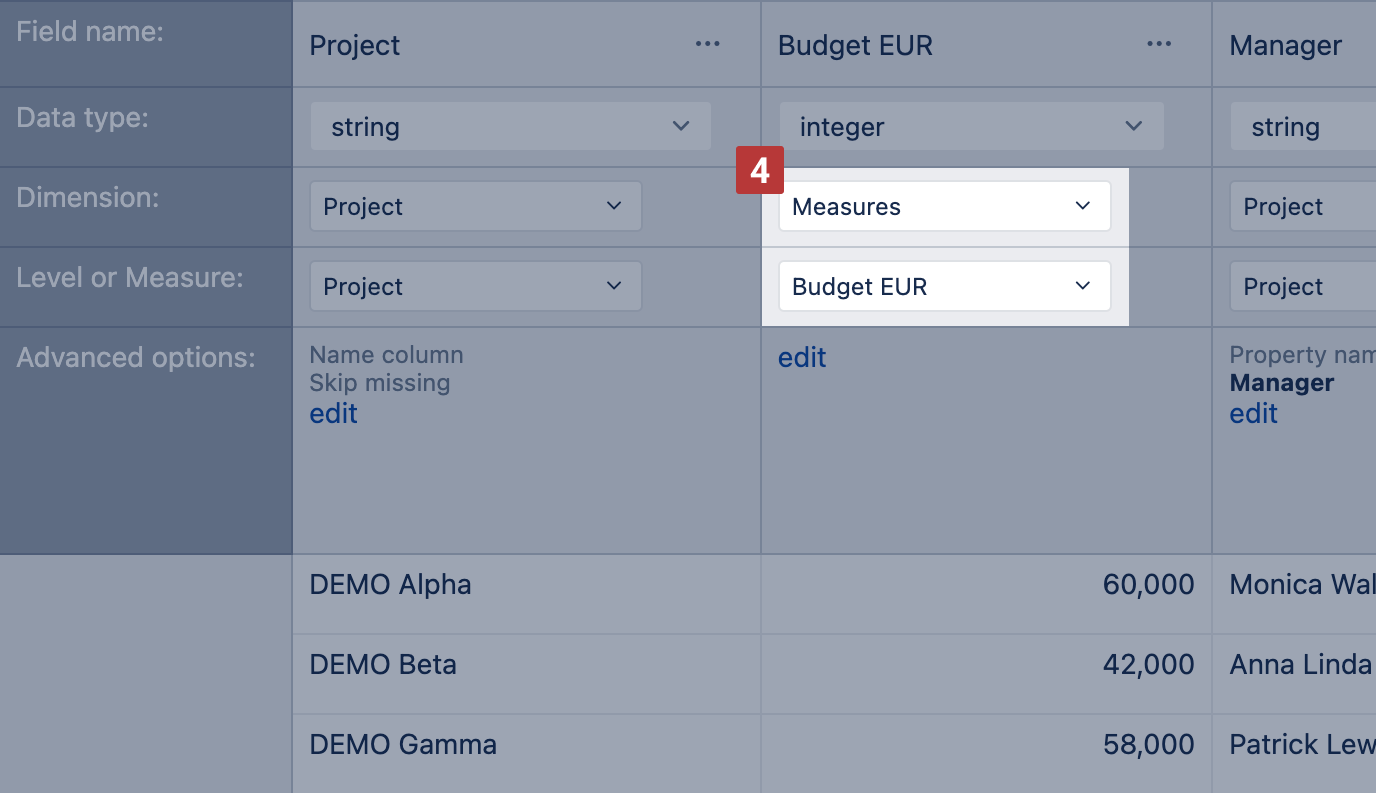
Next, it is necessary to specify how to import other columns. Clicking in the Dimension field, the default import dimension is suggested based on the data type.
- Number is suggested to import as Measure [4]. Note that this measure at a detailed level is visible for linked dimensions only (mapped dimensions in the data mapping screen). For example, if Budget EUR is linked to Project dimension, but, in a report, you wish to add another dimension, e.g. Organization, for grouping data by projects and organizations, there will be value only for All Organizations, but not for individual organizations. This is because we have imported a Budget EUR that depends on a project only, not Project and Organization combinations (for more details see Using additional data in the report below). You may import numeric value also as property, then it could be displayed the same no matter what filter is selected.
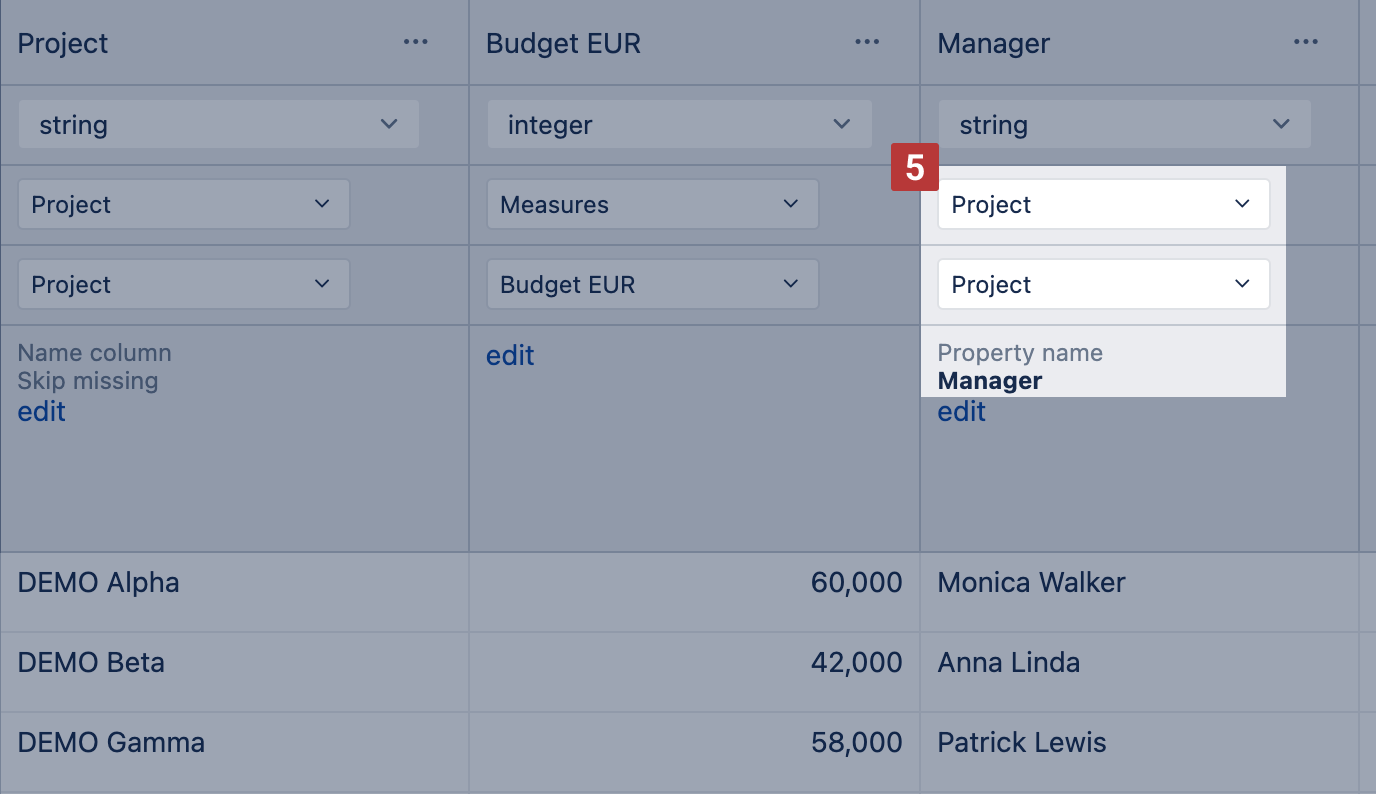
- Any column (number, string, date) could be imported as property [5]. To import a property, select the same Dimension and Level as you have selected in the preceding column for mapping [2] and enter the Property name [5]. The property name does not have to match the Field name that is detected from the source data column header. Order sourced data columns so that property is on the right of dimension member it describes. You may change column order in eazyBI by dragging and dropping the columns.
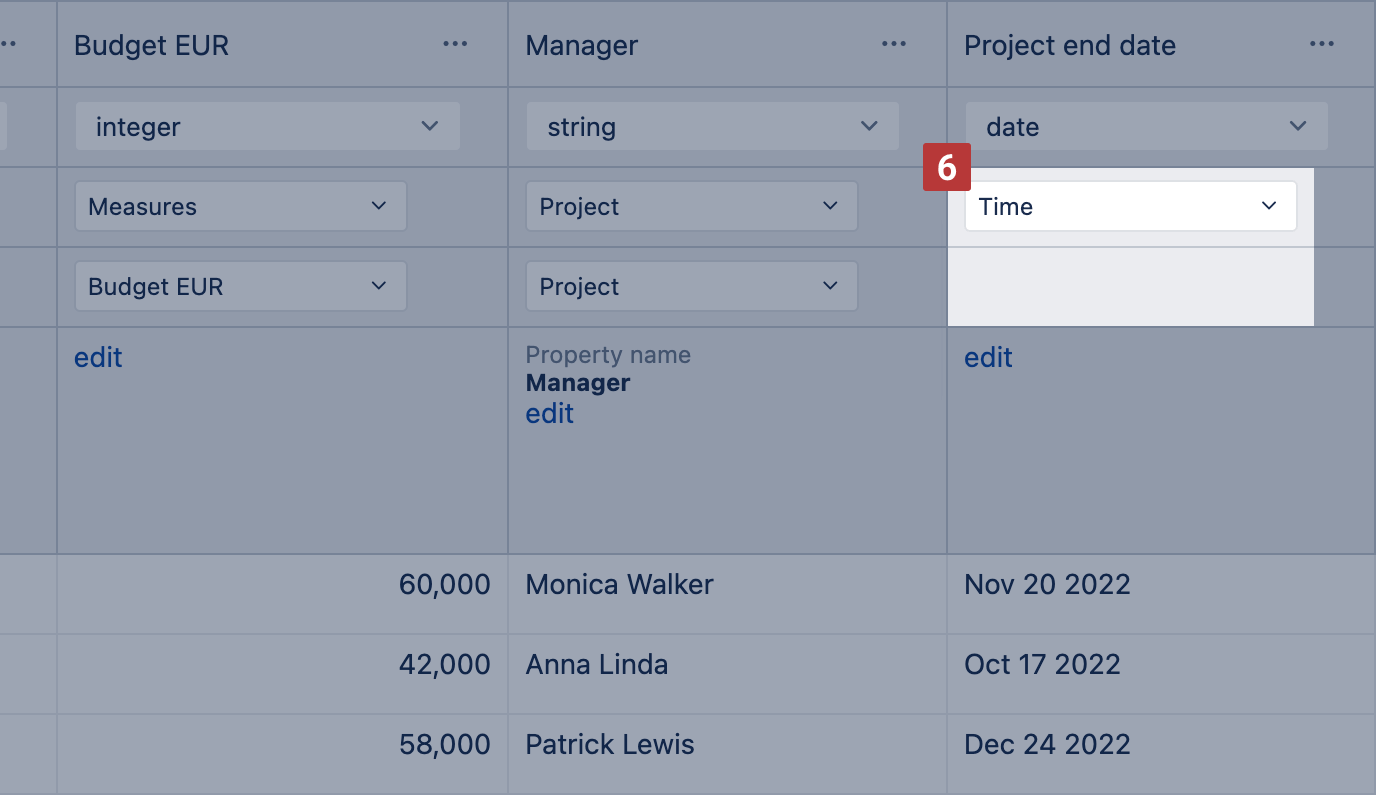
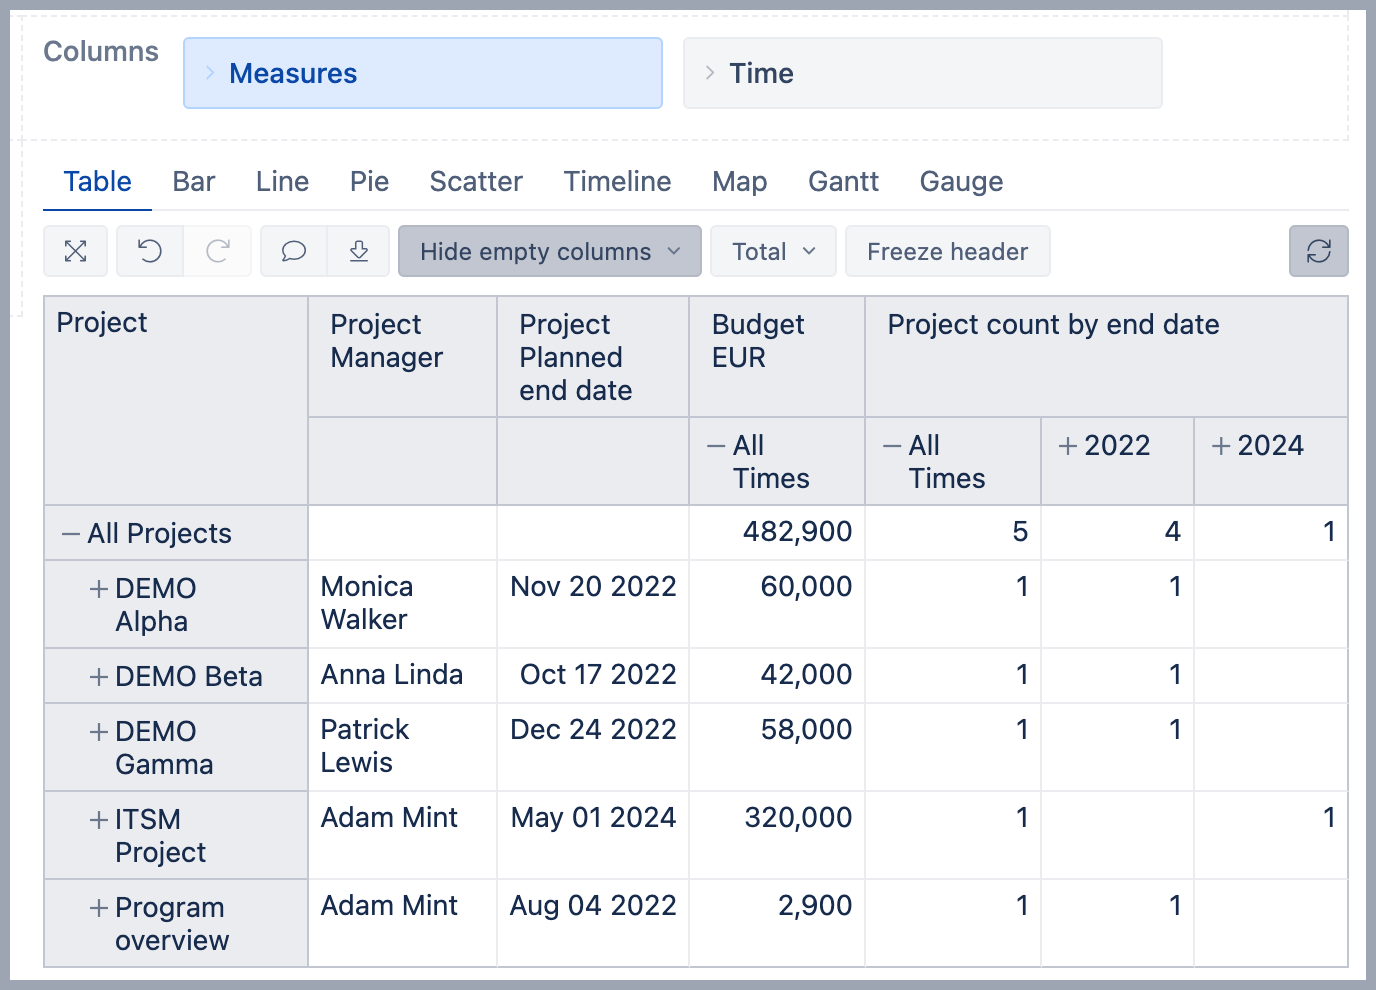
- Date is suggested to be imported as Time, if date matches supported date formats [6]. In the example below, the Project end date is imported to the Time dimension thus the measure Budget EUR is mapped to Project and Time and could be analyzed by both dimensions.
Another option is to import date as property, measure counting rows with the date field, and map that date count measure to the Time dimension [7]. Map the date column the same way you would do for a property by selecting the same Dimension and Level as you have selected in the preceding column for mapping [2]. In advanced options, enter the Property name, a name for date count measure, and click in the field date count dimension to map the date count measure to the Time dimension. In the example below, besides the project property "Planned end date", eazyBI creates new measure "Project count by end date" that combined with the Time dimension will show how many projects have a planned end date in a selected period.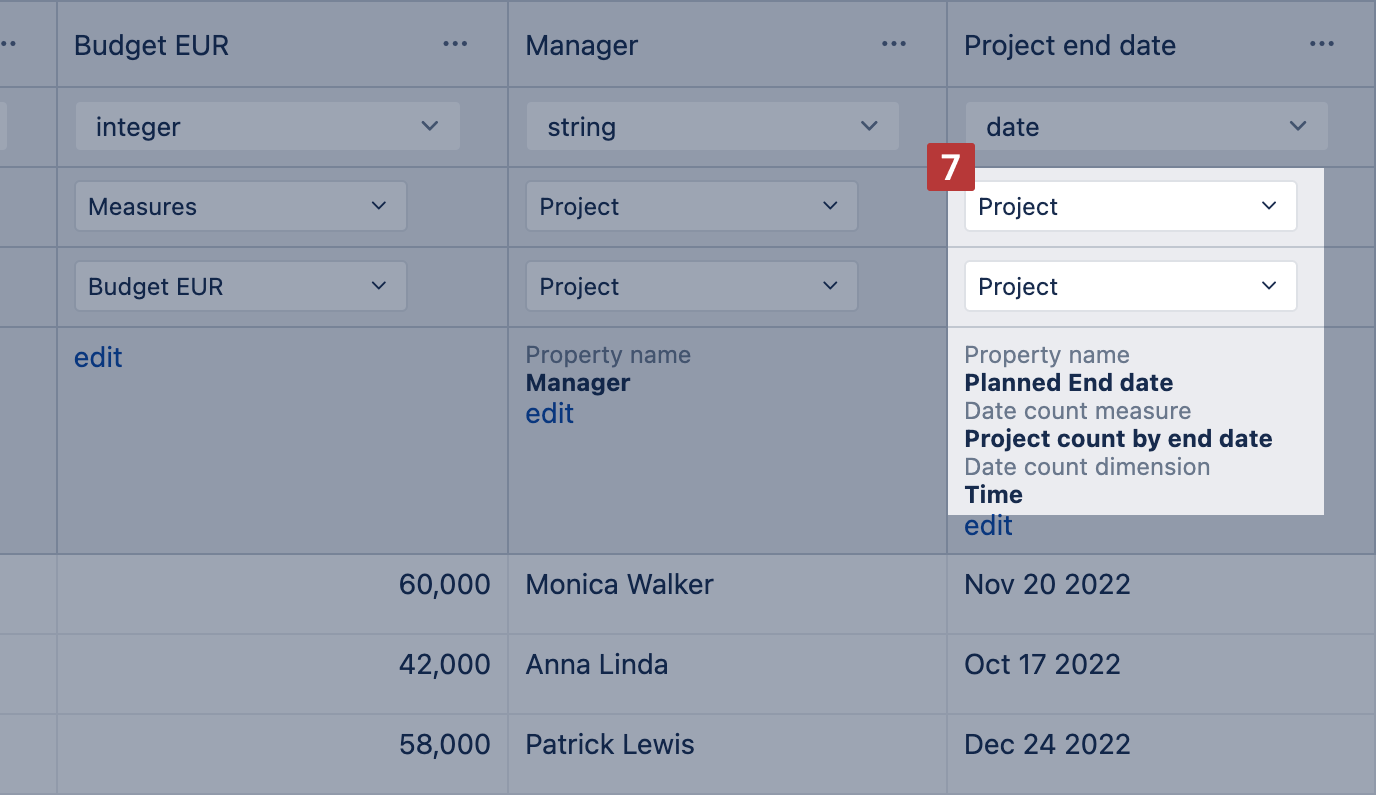
The rest of the columns where Dimension is not specified, remain unmapped and will not be imported. You may enable the option Hide unmapped columns to see which columns are currently mapped and going to be imported.
After mapping is complete you can proceed to import. In the import status, eazyBI shows a successfully imported row count. If there are any errors they are displayed or import stops on the first error. In this case, you should see the error and edit source application parameters or correct source file and upload new version for import.
Please contact eazyBI support if you need any assistance with column mapping.
Mapping to single value custom field dimensions
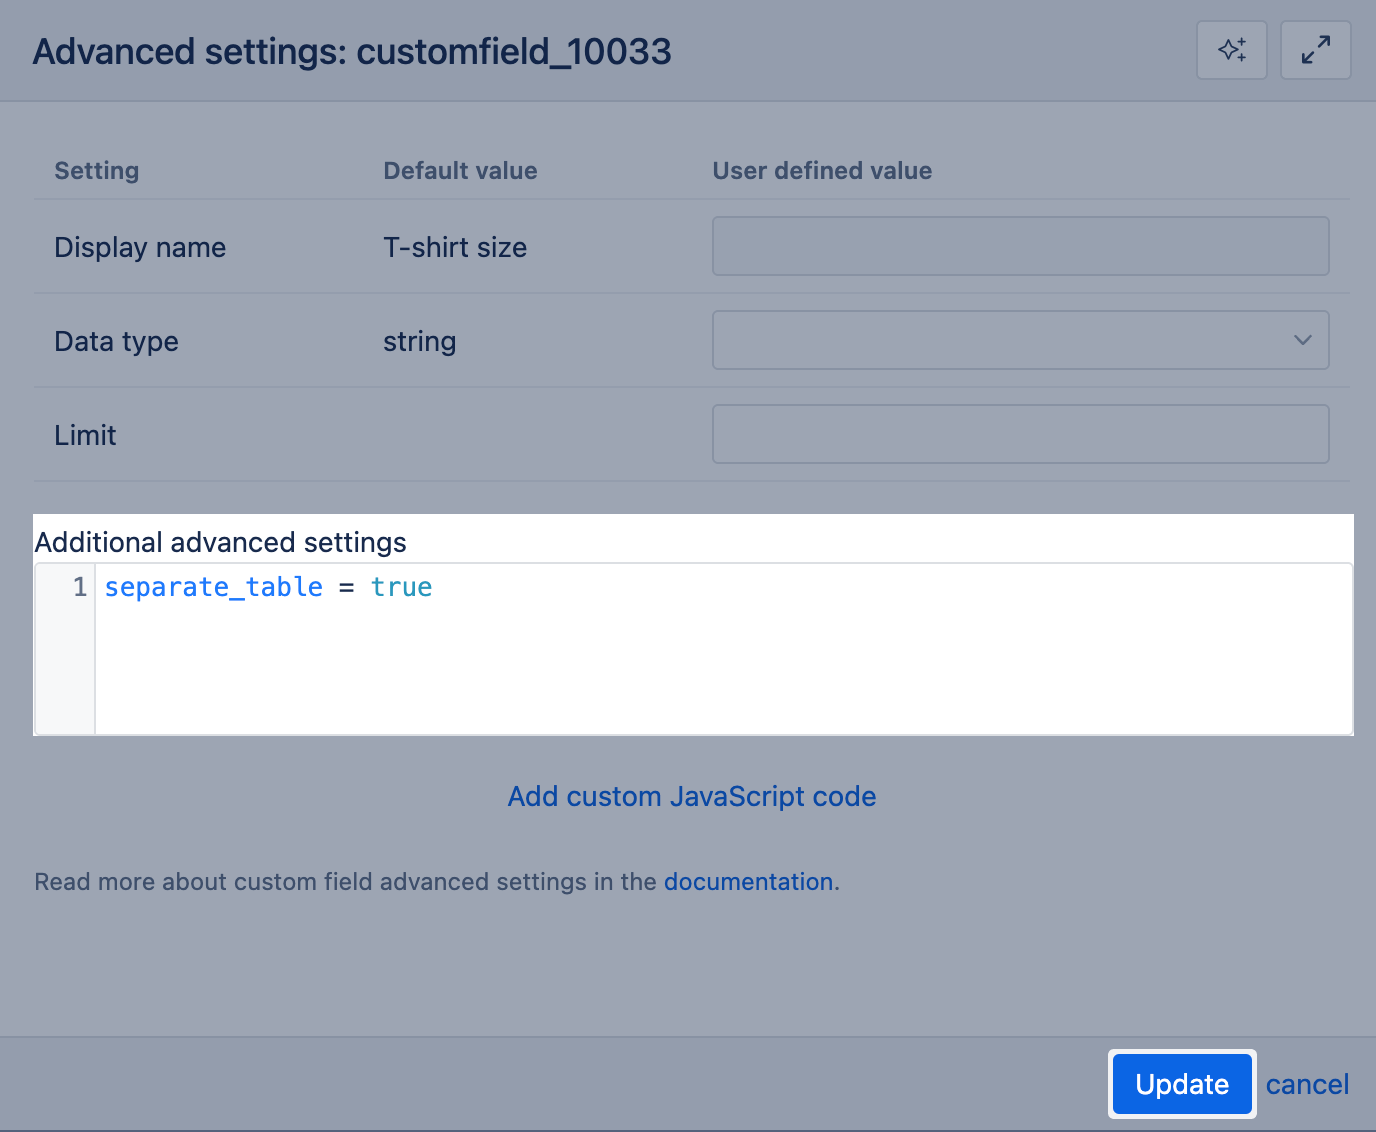
eazyBI supports additional data import to single-value custom field dimensions with one level. Please add an additional separate_table = true parameter to the custom field definition in the import options (see picture below) or in eazyBI advanced settings if the custom field is relevant to all eazyBI accounts.
Using additional data in the report
After successful additional data import, you can proceed to Analyze tab to include the imported data in reports.
- The Imported measures are available in the Measures as User defined measures.
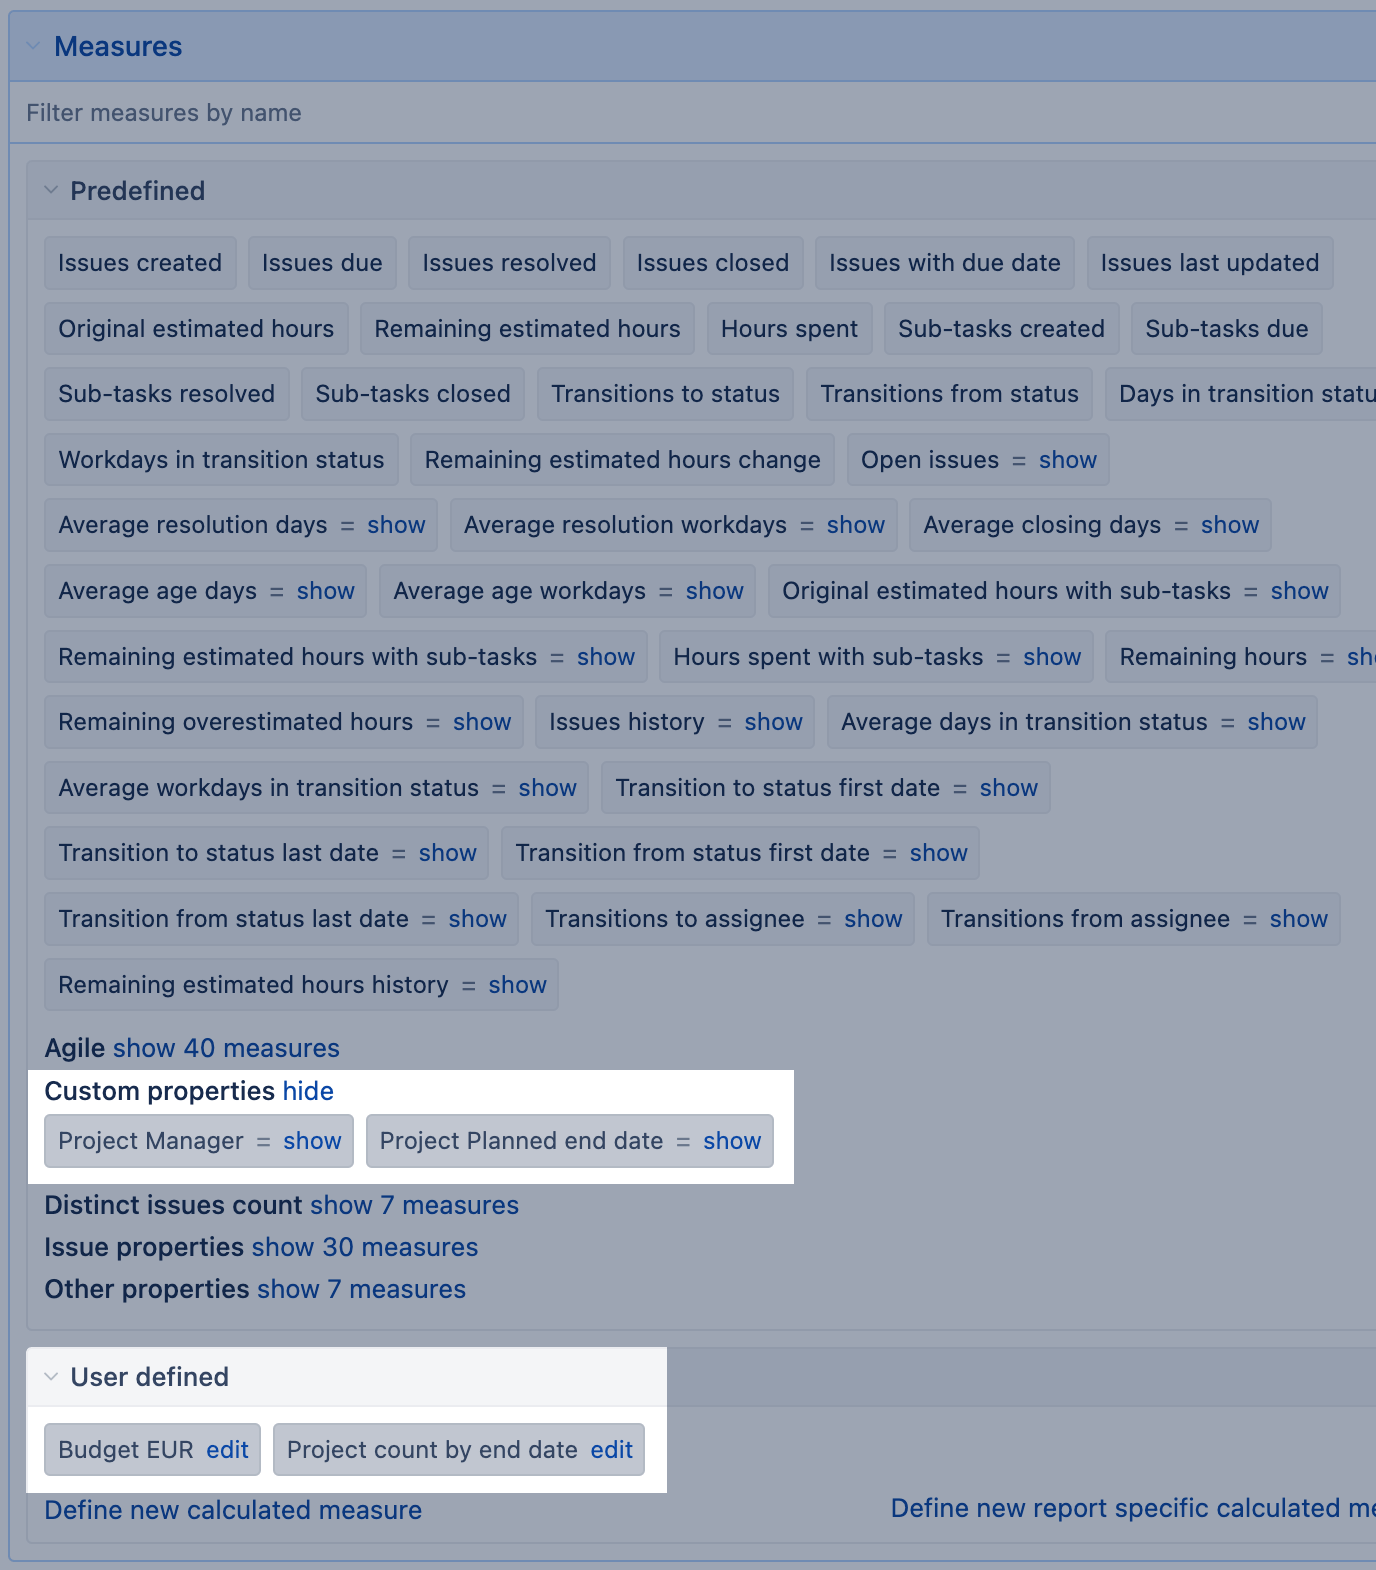
- Imported properties are available in the Measures under the Custom properties section.
If you would like to use an additionally imported measure (like Budget EUR) with other dimensions in the report, you might want to create a new calculated measure to change the measure context and tell to ignore the rest of the report dimensions. Use function DefaultContex() and list dimensions measure is related to (from mapping screen). For example, the expression for Budget EUR to look on ly at selected Project would look like this:
DefaultContext((
  [Measures].[Budget EUR],
  [Project].CurrentHierarchyMember
))
For more details and examples, watch the training video "Building Reports on Different Data Sources".
Deleting additional data
While experimenting with additional data import and looking for the right data mapping, you might want to delete imported data after each iteration.
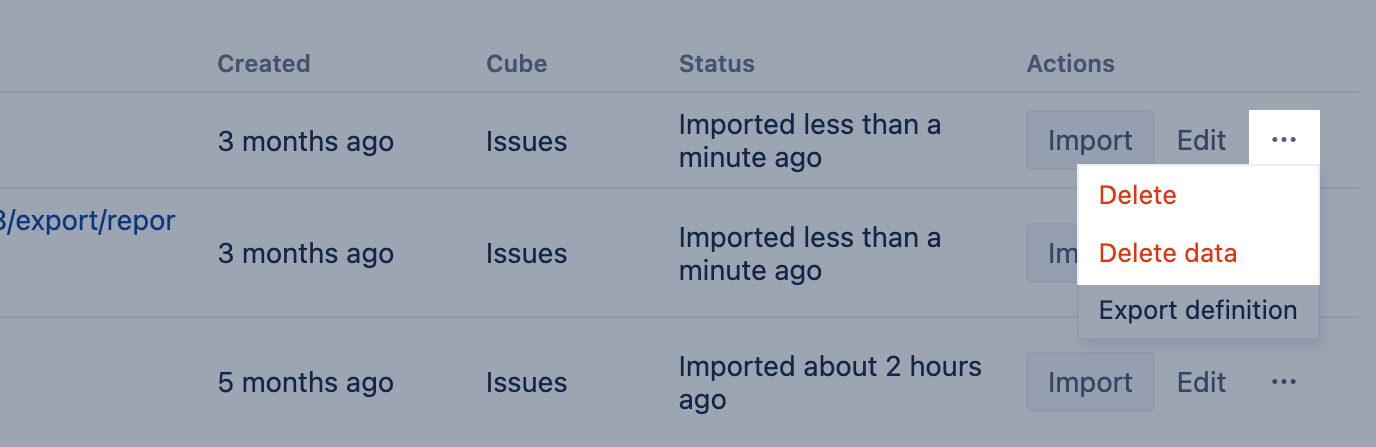
- Go to the Source Data and choose the option Delete data to clear imported measures or Delete to delete the whole data source. While this action clears imported measure values, it does not delete the measure itself or additional imported properties.
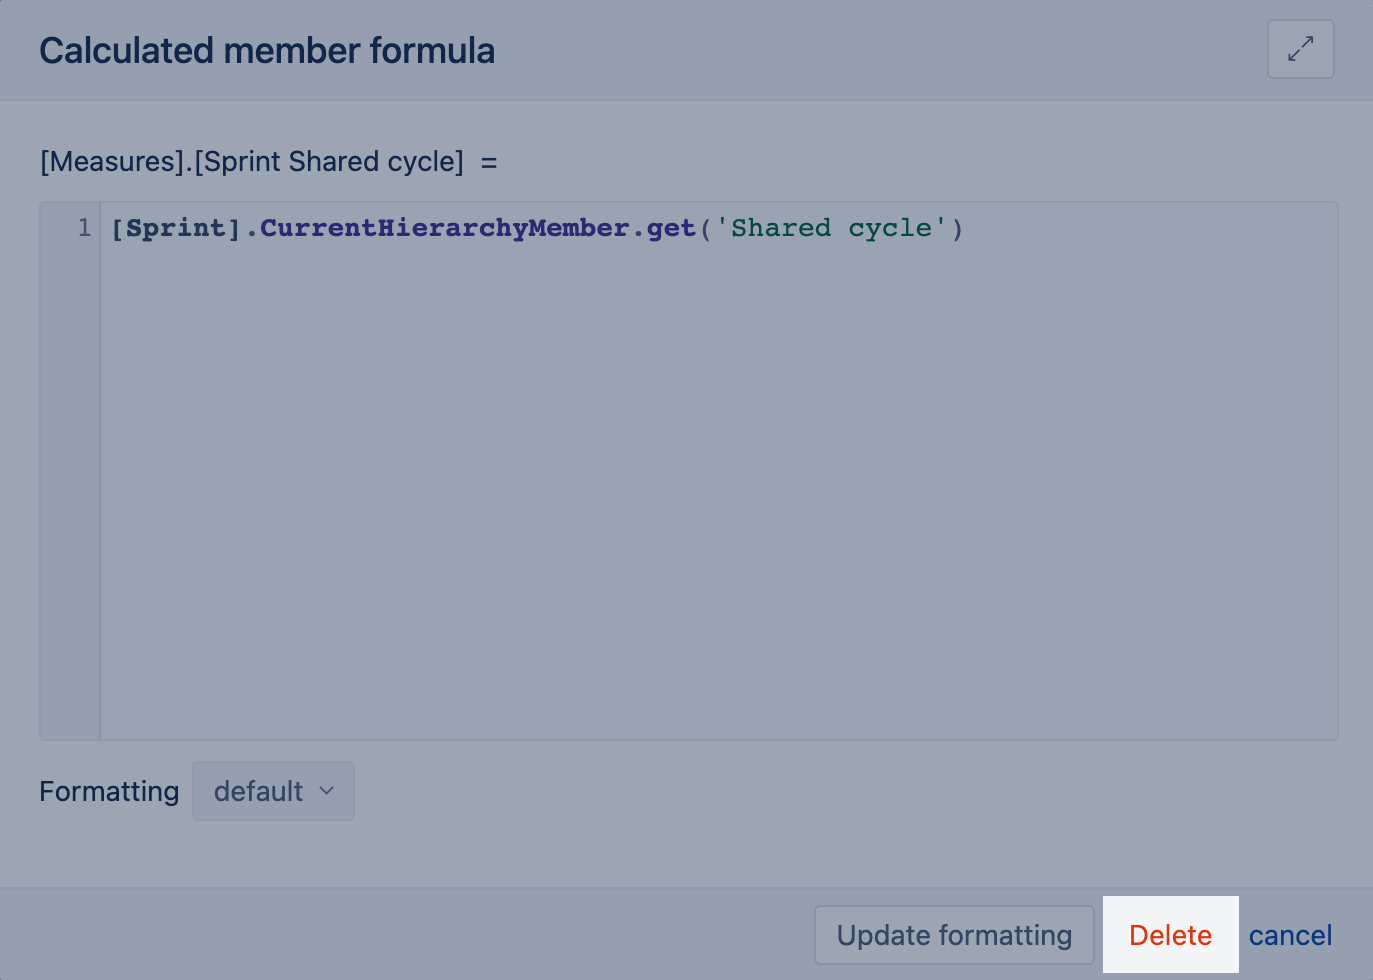
Go to the Analyse section and open Measures. Find measures and properties that were imported with the additional data import, open to show their content, and then select Delete.
See also
- Training video on additionl data import and how to use those data in the reports: Videos: data mapping.
- Supported External data sources
- Details and various option for data mapping