
Database migration on Cloud
eazyBI for Jira
eazyBI stores all data in a separate database. You can use the eazyBI database migration tool to move data from one cloud eazyBI instance to another by using cloud-to-cloud database migrator. The migrator migrates the configuration only. You would like to run data imports to finish the migration and get a working eazyBI.
To access the eazyBI migration tool for eazyBI on your target Jira Cloud instance, install the eazyBI app and add the following lines to advanced settings
[database_migrator]
enable = true
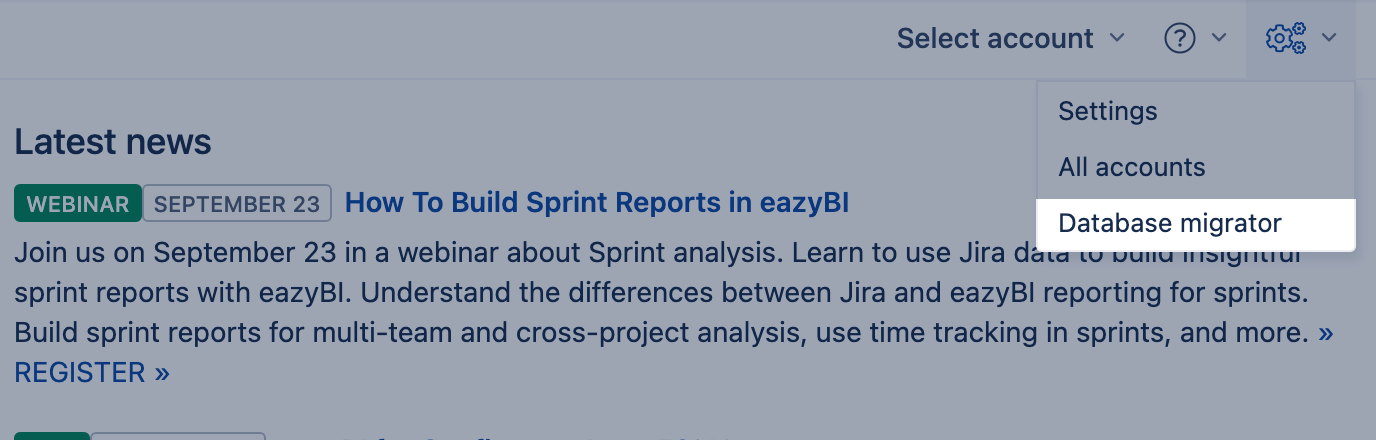
Then click on the cog icon on the top right corner, and in the dropdown menu, select Database migrator.
On this page:
Migrations steps
1. Preconditions
- First - migrate your Jira instance.
- Install the eazyBI app on the target environment. We suggest leaving eazyBI settings empty in the target environment; eazyBI will transfer them from the source environment.
2. Migrating eazyBI accounts
- Select eazyBI accounts for migration and Migrate. Please pay attention to all messages and warnings.
- When the migration process is completed, go to each account and verify account import options:
- Check if at least one project is selected.
- Generate tokens for 3rd party apps.
- Check if custom fields are marked.
- Validate the code in JavaScript calculated custom fields.
- Manually import source data in each account. This step is required to start automatic data imports according to schedule.
3. Post-migration actions
- Update Gadgets in Jira dashboards and Confluence pages.
- Update REST API and SQL SELECT source authorization used to import additional data.
Migration types
Cloud to Cloud
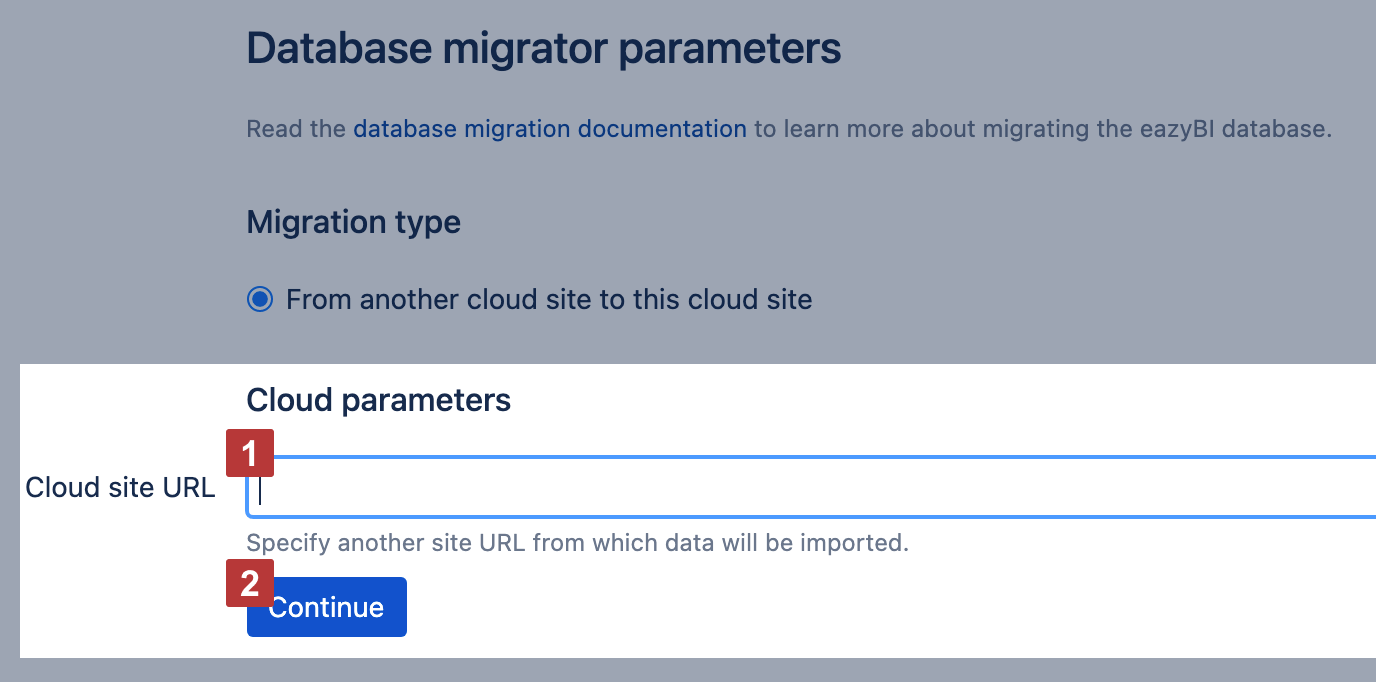
Use this migration type to migrate data from eazyBI on another Jira Cloud instance to eazyBI on your new Jira Cloud instance.
Provide the Jira Cloud site URL for the previous instance you are about to migrate eazyBI from [1]. And click "Continue" [2] to start migration steps from the old Jira Cloud instance.
Server to Cloud
To migrate from an existing Server/Data Center instance to a new Cloud instance, see more info in database migration page.
Select data for migration
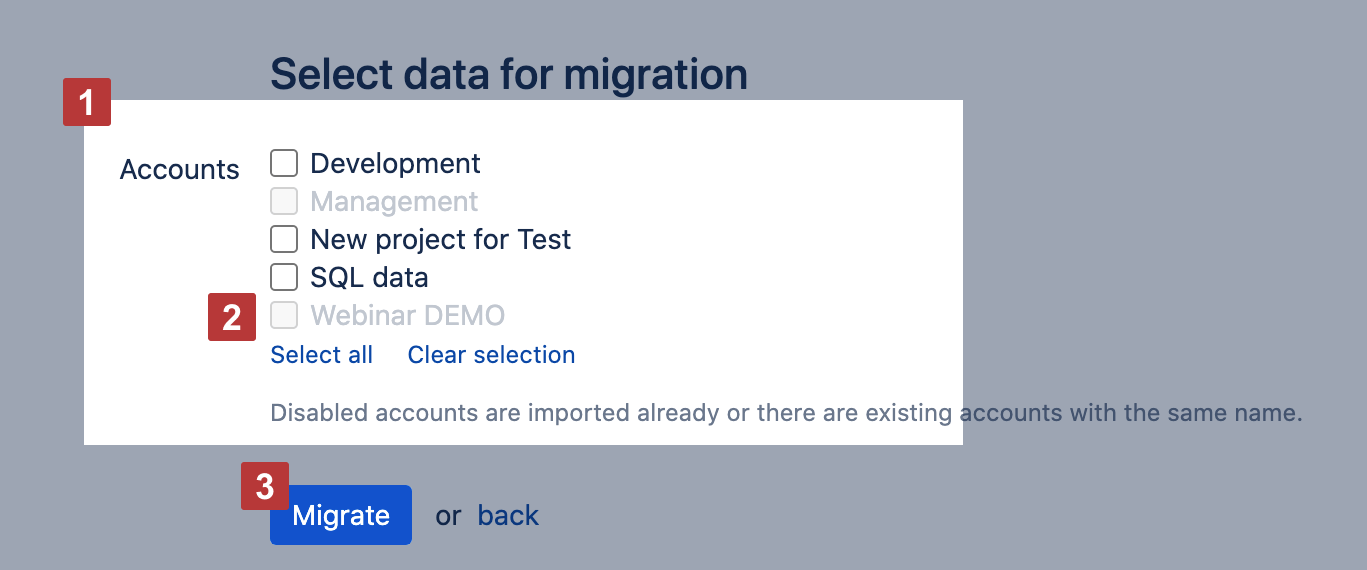
The list of eazyBI accounts [1] will be displayed, which are available for import. If some of these accounts are disabled (greyed out) [2], then it means that either they are already imported, or there are existing accounts with the same name in the current eazyBI database.
Select all or some accounts that you would like to migrate and click the [3] Migrate button.
If you use template accounts make sure you migrate them together with all child eazyBI accounts (that use the template in import options). Database migration for template and child accounts can not be separated.
The migration will copy the following data from the source database to the current database:
- Accounts
- Account users
- Source application definitions (without imported data)
- Source file definitions (without uploaded files)
- Cube definitions (with no data)
- Cube report definitions
- Calculated member formulas
- Dashboard definitions, including email subscription settings
Re-import source data
Only source applications (like Jira, REST API or SQL) definitions will be migrated. No source data are migrated. After the migration, go to the Source Data tab of each migrated account and verify the selected import options - projects, add-ons, custom fields, etc.
When you migrate eazyBI accounts with projects, add-on integrations, and custom fields selected for import that don't exist in Jira for the new eazyBI installation, reports using this data could stop working.
Finally, start the data import from all source applications. After the data import, you can go to the Analyze tab and open your existing reports.
If you had any uploaded source files, then please re-upload them in the Source Data tab and re-import data from all source files.
Gadgets in Jira dashboards and Confluence pages
When you publish eazyBI reports or dashboards as gadgets on Jira dashboards and Confluence pages, then an internal report or dashboard ID is saved in the gadget parameters. After database migration, internal report and dashboard IDs might be different from those in the source database. Therefore, please verify all published eazyBI gadgets if they show the correct reports and dashboards and, if necessary, change gadget settings.
After migration, eazyBI report gadgets must be re-added to the new Jira instance dashboard manually.