Account specific calculated fields
eazyBI for Jira
Overview
The "Add new calculated field" option allows you to define new JavaScript calculated custom fields in the Jira import options. However, unlike defining new JavaScript calculated custom fields in eazyBI advanced settings, these custom fields are available for import into the particular Jira issues cube only.
This option is available for Jira system administrators, Jira trusted users, eazyBI admins, and eazyBI account users with roles allowing source data import. The settings are applied only within the specific Jira source application import.
New calculated field
eazyBI can include new JavaScript calculated custom fields into the Jira source data import with the new calculated field option. You can [2] Add new calculated field from the eazyBI import options [1] "Custom fields" tab.

If you base your calculation on existing custom fields, you must first import these custom fields (at least as property) into the data cube.
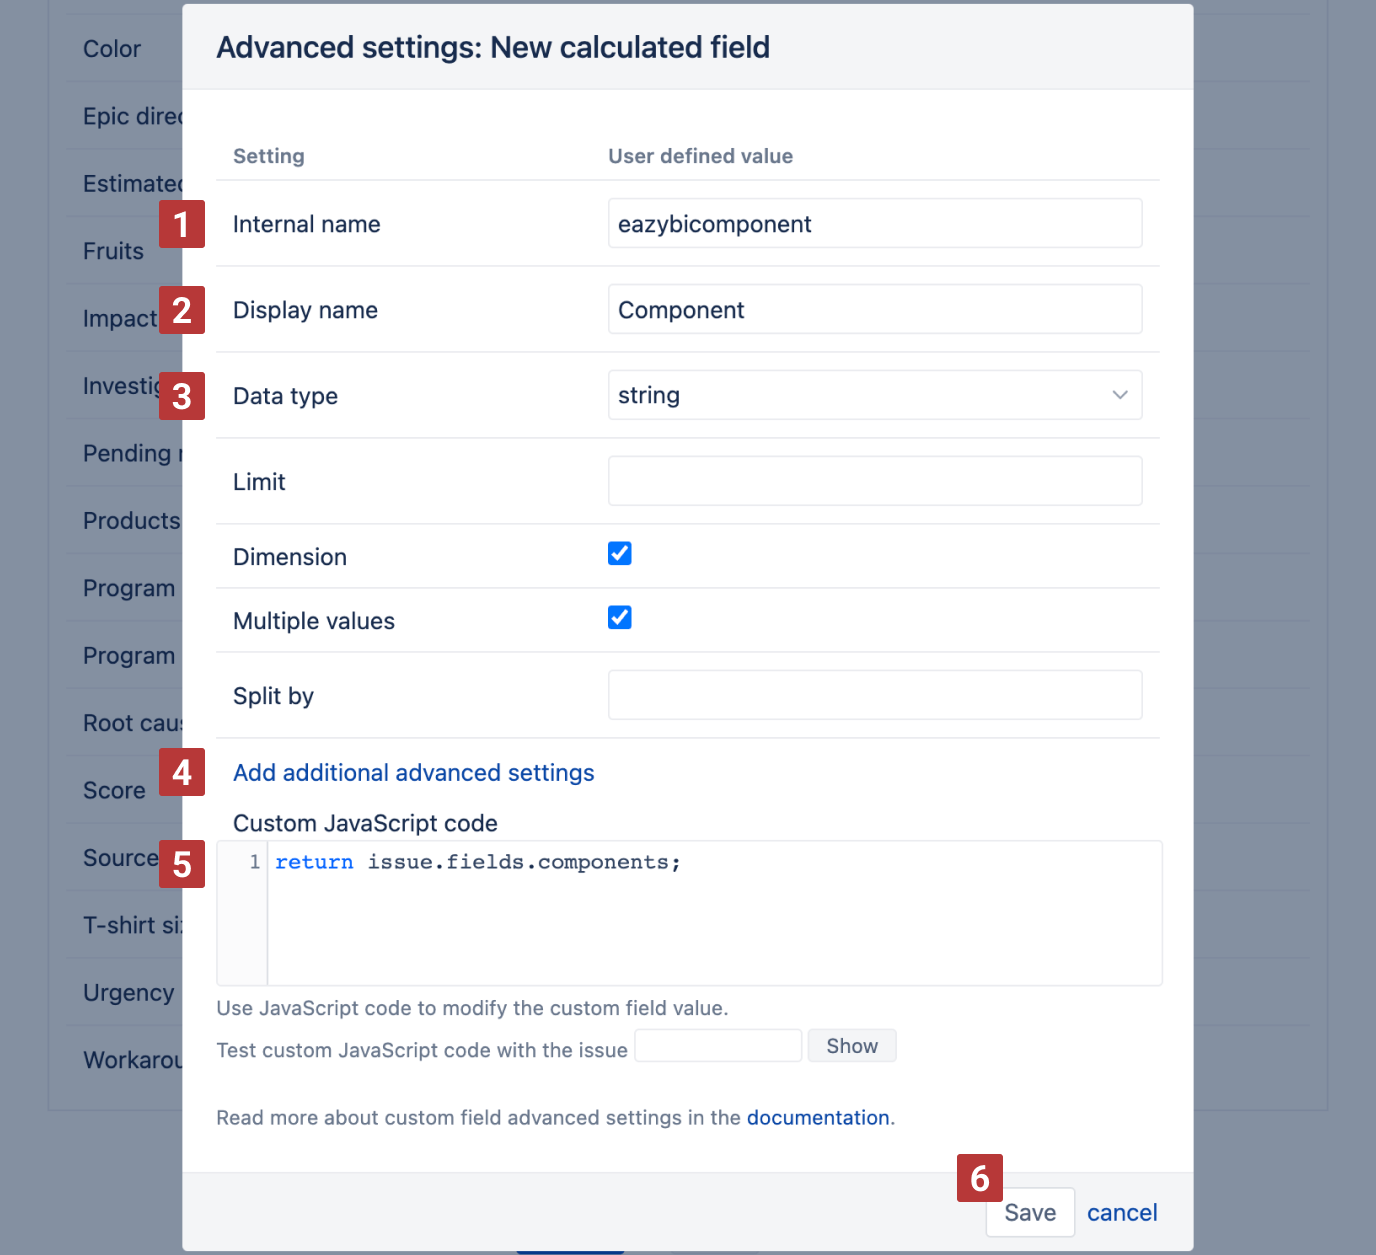
First, specify the [1] Internal name for the new calculated field - a unique name using only lowercase letters, numbers, and underscores.
Choose a [2] Display name for this calculated field that will appear in the Jira import custom fields selection and be imported in the Analyze view.
Select which [3] Data type the calculated field will return - "string","text","integer","decimal","date","datetime". Depending on the selected data type, other custom field options will appear.
If necessary, you can [4] Add additional advanced settings for the calculated field. These settings are similar to the ones described in the custom field import options.
Finally, use [5] Custom JavaScript code to calculate and return the results with the JavaScript return statement. The return statement is a major difference compared to how JavaScript calculated custom fields assign value to fields defined in the eazyBI advanced settings. The dialog is similar to the one described in the custom field import options.
Use the JavaScript return statement to retrieve the value changed with custom JavaScript code.
Once you have defined the new calculated field and its options, click [6] Create and see how to apply them.
Validate JavaScript code for an account specific calculated field
We highly recommend testing and debugging your JavaScript code before saving the new field and importing the data.
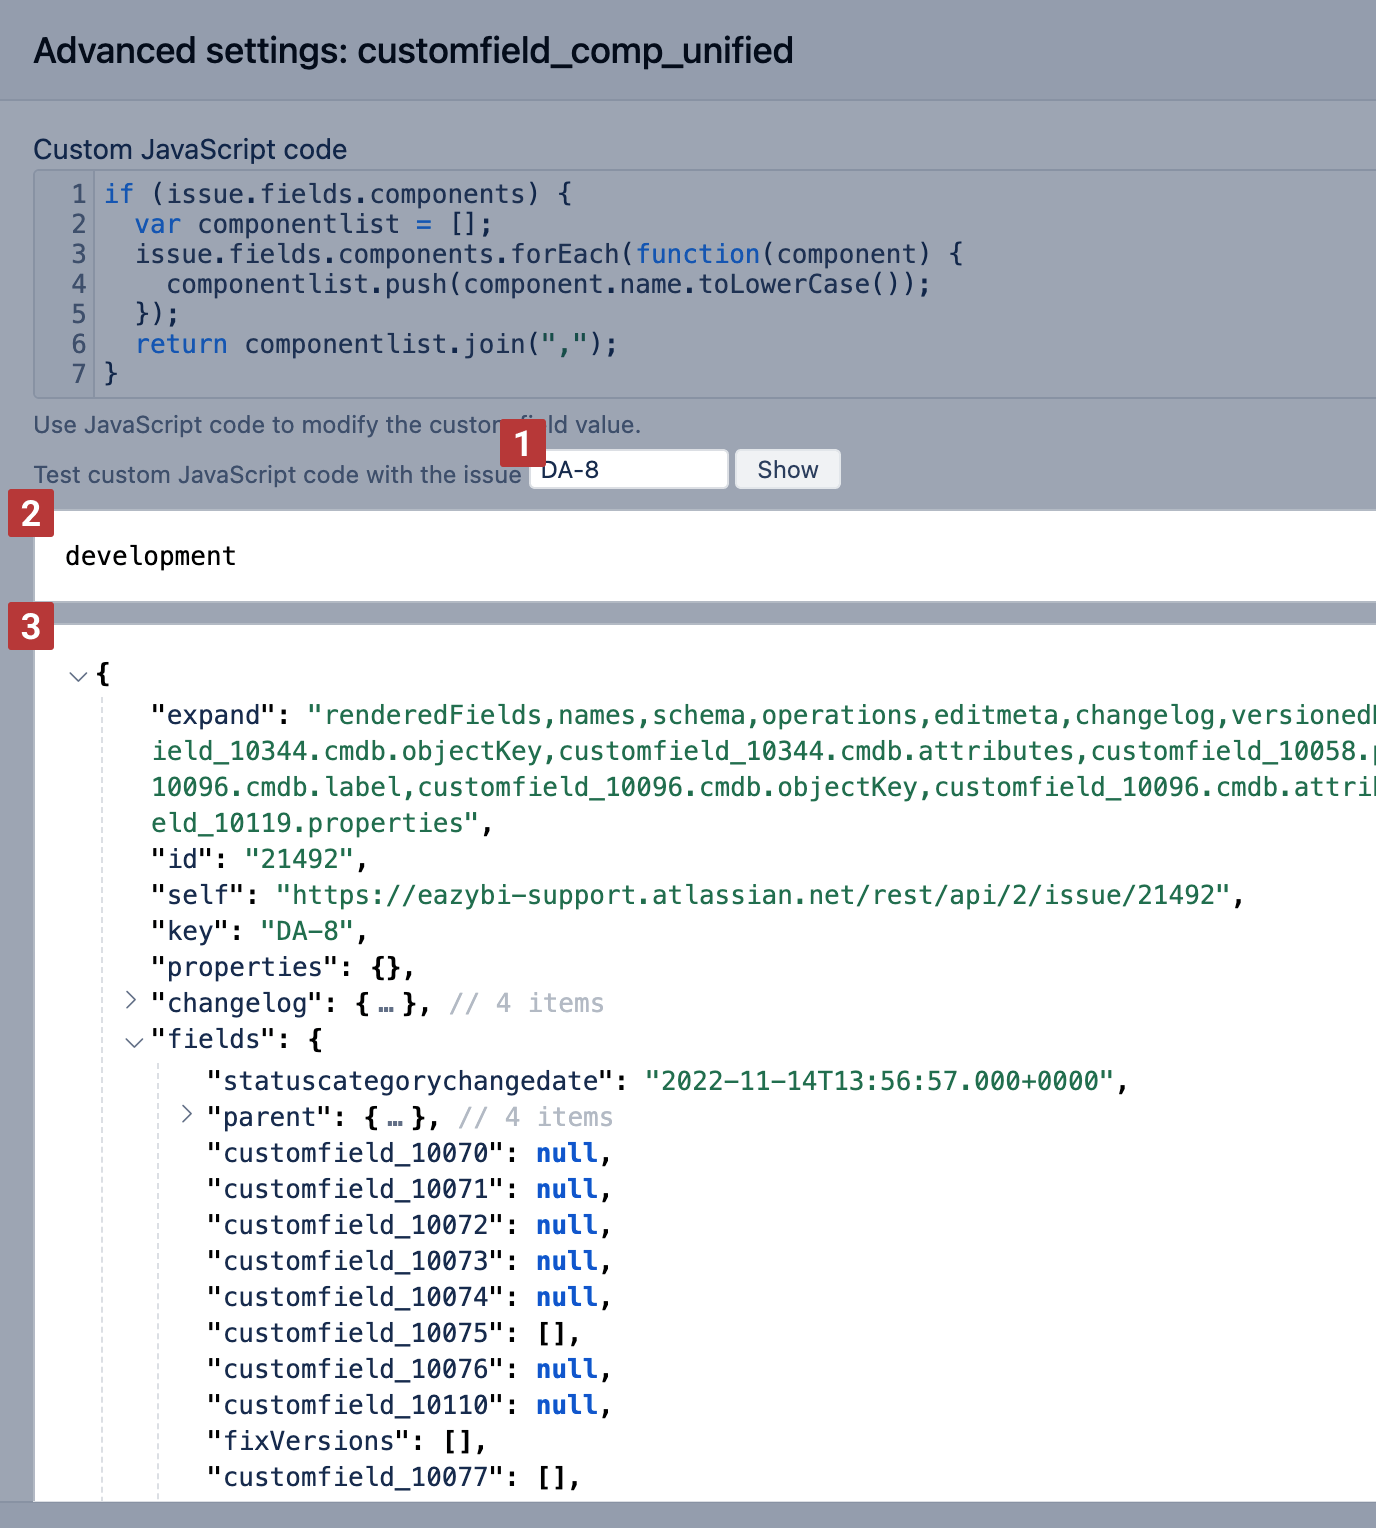
Specify an issue key on which you would like to test your JavaScript code and see the calculated results [1]. Test custom JavaScript code with several issues and validate if the newly defined custom field results appear as needed. Use at least two issues for testing, one that would get the calculated value and another to test behavior if an issue does not have any required data (for an empty result).
eazyBI will show results for the custom JavaScript code [2] and the other issue fields in JSON format [3]. Issue data in JSON format is handy because it shows the full path to the field and its value. By default, you can see only standard-issue fields and selected custom fields in the issue JSON object.
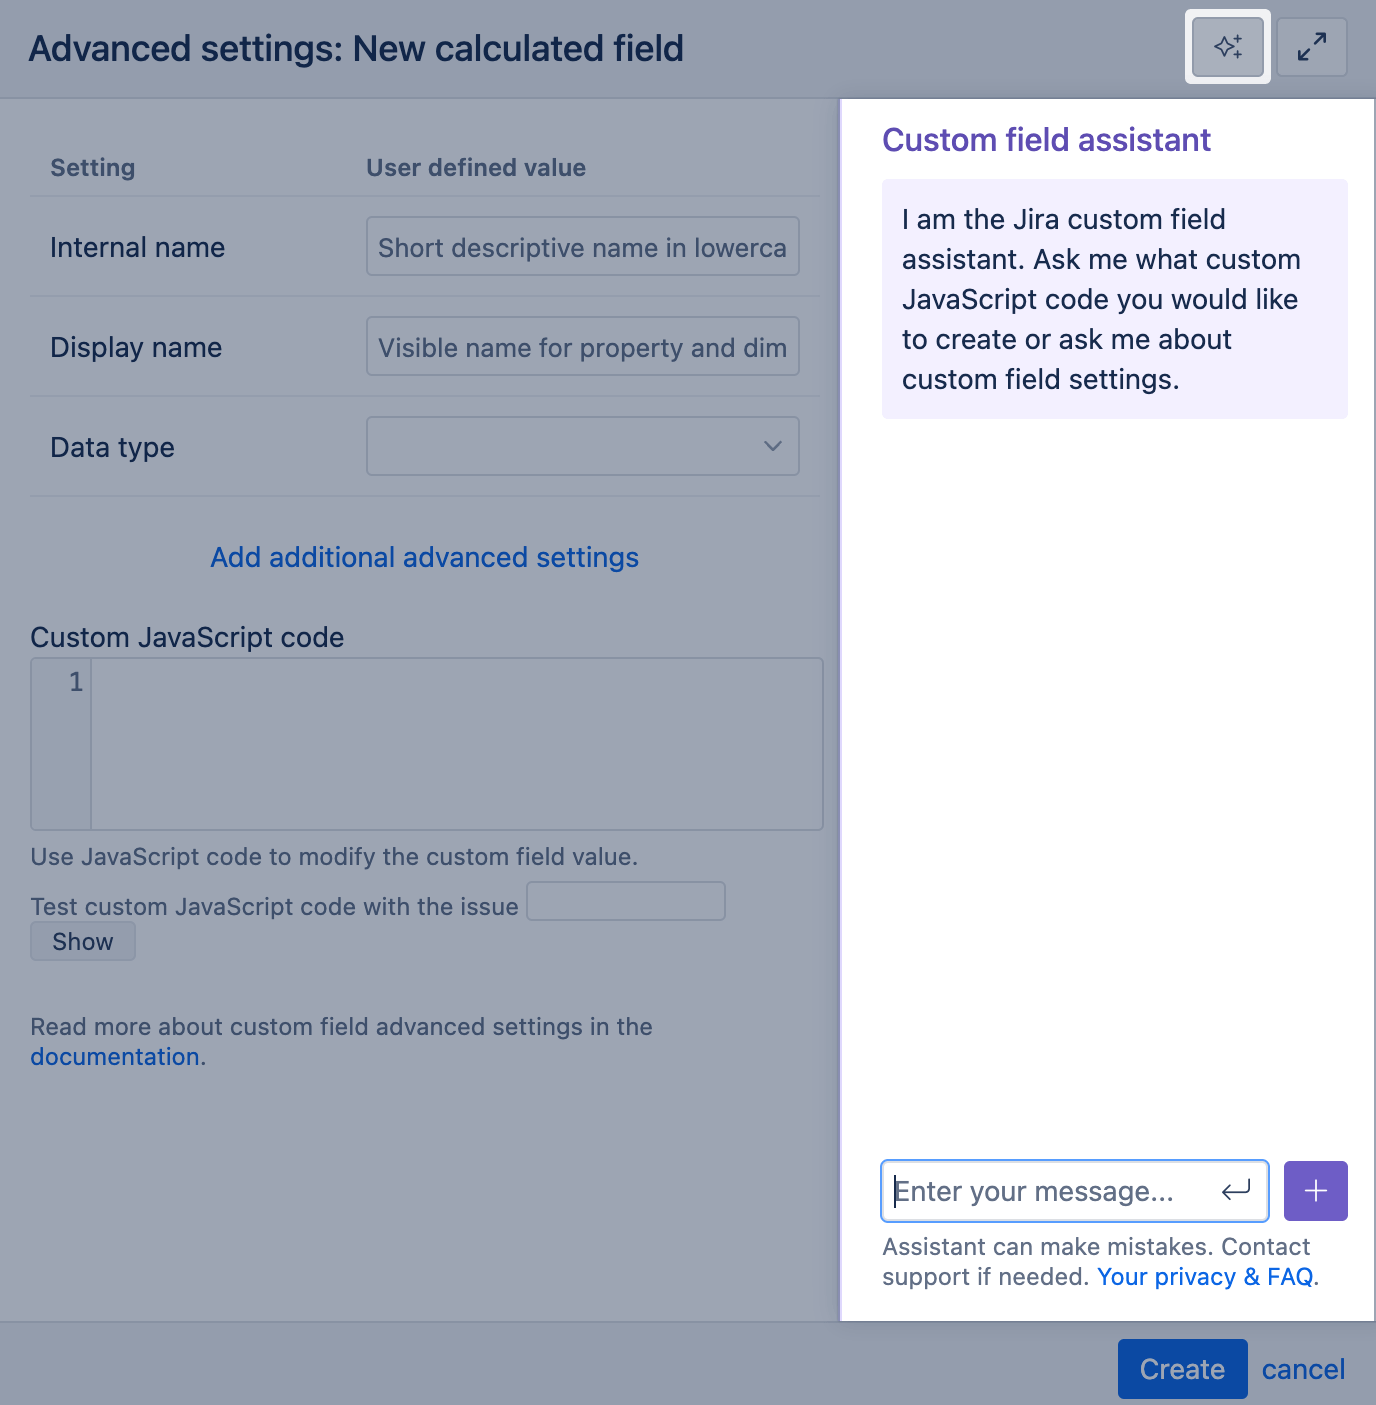
Custom Field Assistant
You can ask the custom field assistant to generate JavaScript code for a specific purpose, explain already written code, or ask about custom field settings. Writing code with an assistant is an iterative process, during which you should check the suggested code and make adjustments if necessary; this goes hand in hand with validating JavaScript code to see if the outcome is right.
Custom field assistant does not collect your data, only the prompts you are writing in the conversation window. For more details on privacy and how this works, see the eazyBI Assistants FAQ.
See also
Training video I Want My Custom Fields, and I Want Them Now on custom field import options and calculated fields
Examples
Here are several examples:
- Age since updated interval
- All Links
- Cascading field concatenated
- Component
- Count of all links
- Count of Comments
- Count of Comments by Time
- Count of updated worklogs by worklog period
- Count of Votes
- Created year
- Creator
- Current assignee
- Current issue type
- Current priority
- Current status age
- Custom resolution interval
- Days in Priority
- Description
- Due date changes by time
- Due date timestamp changes
- Environment
- Epic level custom field
- First comment date
- First comment when issue flagged
- First due date
- First worklog date
- Last comment
- Last date when custom field changed
- Latest comment author name
- Latest comment date
- Latest external comment date
- Latest JSM customer comment date
- Multi-level cascading field
- Overdue interval
- Previous status
- Status Category
- Status category change week
- Summary
- Watchers
- Worklog calculated fields